infant jesus novena pdf

The Infant Jesus Novena is a nine-day devotion honoring the Divine Infant Jesus of Prague‚ fostering trust‚ prayer‚ and faith in His miraculous intercession and grace․

What is the Infant Jesus Novena?

The Infant Jesus Novena is a nine-day prayer devotion dedicated to the Divine Infant Jesus of Prague‚ emphasizing faith‚ trust‚ and devotion․ It involves daily prayers‚ reflections‚ and petitions‚ often accompanied by specific rituals․ The novena seeks miracles‚ inner peace‚ and spiritual growth‚ fostering a deep connection with the Infant Jesus․ PDF resources are widely available for devotees to follow the prayers faithfully․

Significance of the Novena in Catholic Devotion

The Infant Jesus Novena holds deep significance in Catholic devotion‚ fostering spiritual growth and inner peace․ It is a powerful prayer tradition that invites believers to seek miracles and intercessions through the Divine Infant Jesus of Prague․ The novena strengthens faith‚ provides comfort‚ and connects devotees to the Holy Child’s boundless mercy and grace‚ making it a cherished practice in Catholic spirituality․

History and Origins of the Infant Jesus of Prague

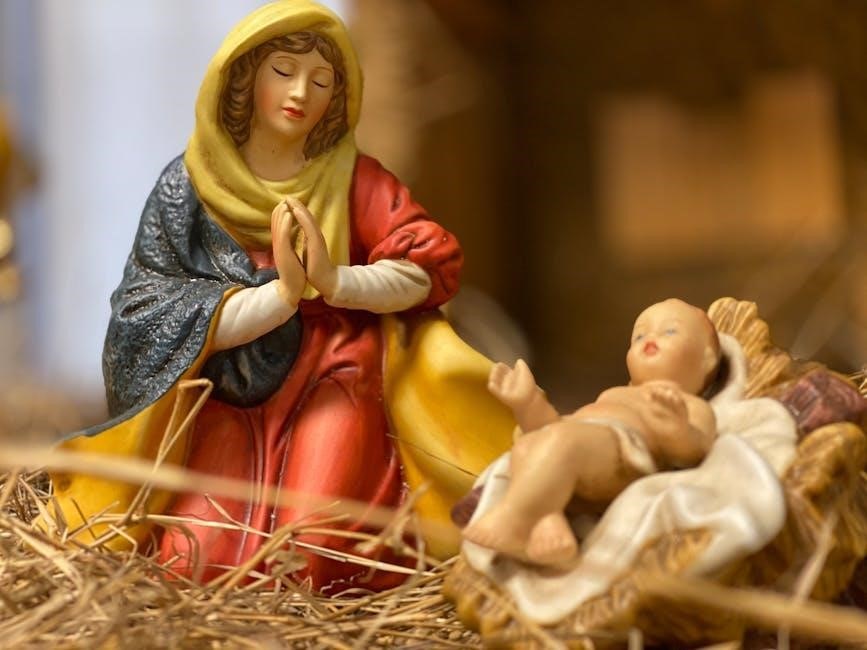
The Infant Jesus of Prague’s origins trace back to a miraculous 16th-century statue in Prague‚ cherished for its divine connection and survival through wars and fires‚ symbolizing hope and devotion․

The Story of the Miraculous Statue

The Infant Jesus of Prague’s statue was discovered in the 16th century‚ believed to have been carved by a monk in Spain․ It miraculously survived fires and wars‚ with legends of healing and protection surrounding it․ Father Cyril found and restored it‚ reigniting devotion․ The statue’s survival and miracles solidified its sacred status‚ inspiring global veneration and the novena prayers in its honor․

How the Devotion Spread Worldwide

The devotion to the Infant Jesus of Prague spread globally through missionaries and pilgrims․ Miracles attributed to the statue drew faithful followers‚ establishing shrines worldwide․ Novena prayers were translated into multiple languages‚ adapting to diverse cultures while maintaining the core devotion․ This global reach has made the Infant Jesus a beloved symbol of faith‚ hope‚ and divine intercession across continents and communities․

Structure of the Infant Jesus Novena

The Infant Jesus Novena consists of nine consecutive days of prayer‚ with specific reflections and petitions for each day‚ fostering spiritual growth and divine connection․

Daily Prayers and Reflections

The Infant Jesus Novena includes daily prayers and reflections‚ each focusing on specific virtues and intentions․ Devotees recite invocations‚ petitions‚ and thanksgiving prayers‚ deepening their spiritual connection․ Reflections emphasize childlike faith‚ humility‚ and trust in God’s providence․ These daily devotions aim to foster inner peace‚ spiritual growth‚ and a closer relationship with the Divine Infant Jesus‚ while seeking His miraculous intercession and blessings․

Traditional vs․ Modern Practices

Traditionally‚ the Novena is prayed over nine consecutive days‚ often with hourly devotions in urgent cases․ Modern practices adapt to personal convenience‚ using downloadable PDFs for home or digital prayer․ While the essence remains unchanged‚ flexible scheduling and digital resources have made the Novena more accessible‚ blending timeless devotion with contemporary practicality for diverse spiritual needs and lifestyles․

Key Prayers of the Infant Jesus Novena

The Novena includes core invocations seeking mercy and blessings‚ alongside daily petitions for specific needs‚ emphasizing faith and trust in the Infant Jesus’s miraculous intercession․

The Core Invocation and Petitions

The core invocation begins with “O Jesus‚ Who has said‚ Ask and you shall receive‚” seeking divine assistance through Mary’s intercession․ Petitions include requests for mercy‚ deliverance from evil‚ and spiritual growth‚ reflecting trust in the Infant Jesus’s boundless grace and miracles‚ as outlined in the Infant Jesus Novena PDF resources․

Special Prayers for Each Day

The Infant Jesus Novena PDF includes distinct prayers for each day‚ focusing on themes like trust‚ surrender‚ and divine mercy․ These prayers‚ often recited hourly or daily‚ deepen devotion and address specific intentions‚ fostering a personal connection with the Divine Infant Jesus and His miraculous intercession throughout the nine-day period․

Benefits of Praying the Infant Jesus Novena

Praying the Infant Jesus Novena fosters spiritual growth‚ inner peace‚ and deepened faith․ It seeks miracles‚ healing‚ and divine intercession‚ offering hope and comfort to devotees worldwide through its powerful prayers․

Spiritual Growth and Inner Peace

Praying the Infant Jesus Novena nurtures spiritual growth by fostering a deeper connection with God․ It encourages surrendering worries to divine care‚ seeking guidance‚ and finding hope in challenging times․ The novena’s reflective prayers cultivate inner peace‚ trust‚ and faith‚ helping believers embrace God’s will and live with joy and gratitude‚ inspired by the Infant Jesus’s loving presence and promises of mercy and grace․

Seeking Miracles and Intercessions

The Infant Jesus Novena is renowned for its miraculous intercessions‚ offering hope and comfort in times of need․ Devotees worldwide pray for healing‚ guidance‚ and divine intervention‚ trusting in the Infant Jesus’s promise to grant requests․ The novena’s prayers‚ such as the urgent nine-hour devotion‚ reflect a deep faith in His power to transform lives and answer heartfelt pleas with mercy and grace․

How to Pray the Novena Effectively

Prepare by setting aside a quiet‚ distraction-free space and time for prayer․ Use the Infant Jesus Novena PDF to follow daily prayers and reflections․ Consistency is crucial; commit to praying each day without missing․ Reflect on each prayer’s meaning and how it applies to your life․ Consider incorporating traditional practices like lighting candles or visiting a shrine․ Praying with others can also enhance the experience․ Ensure you have the necessary materials‚ like a printed novena prayer guide‚ to follow along easily each day․ Approach the novena with sincerity and an open heart to deepen your faith and connection with the Infant Jesus․

Preparing for the Novena

Begin by downloading the Infant Jesus Novena PDF to access the complete prayers and reflections․ Create a quiet‚ reverent space for prayer‚ free from distractions․ Review the daily prayers in advance to familiarize yourself with the structure․ Set a specific intention or petition before starting the novena․ Gather any necessary materials‚ such as candles or holy water‚ to enhance your devotion․ Reflect on the significance of the Divine Infant Jesus of Prague and His miraculous intercession to deepen your spiritual preparation;

Practical Tips for Consistent Prayer

Set aside a specific time daily for prayer‚ using the Infant Jesus Novena PDF as your guide․ Create a quiet‚ prayerful environment with symbols like the Infant Jesus statue or candles․ Reflect on each prayer’s meaning and relate it to your life․ If you miss a day‚ extend the novena without guilt․ Keep your intentions clear and trust in the Divine Infant’s intercession for guidance and peace․

Popular Variations of the Novena

The novena can be adapted for urgent needs with hourly prayers or tailored to cultural traditions‚ offering flexibility while maintaining its core spiritual significance and devotion․

Novena of Hours for Urgent Needs

The Novena of Hours is a condensed version for urgent needs‚ involving nine successive hours of prayer․ It focuses on immediate intercession‚ emphasizing trust in the Infant Jesus’s miraculous power․ This format allows devotees to seek swift divine assistance‚ aligning with the novena’s traditional structure but adapted for pressing circumstances‚ ensuring spiritual support when needed most․

Adaptations in Different Cultures

The Infant Jesus Novena has been embraced globally‚ with cultural adaptations enriching its practice․ In India‚ for instance‚ it is often prayed in Malayalam‚ while in other regions‚ local prayers and traditions are incorporated․ The novena’s core devotion remains unchanged‚ but its expression varies‚ reflecting the diversity of faith and the universal appeal of the Infant Jesus’s miraculous intercession․

Cultural and Religious Significance

The Infant Jesus Novena holds deep cultural and religious significance‚ reflecting trust in the Divine Infant’s miracles and fostering spiritual connection across global Catholic communities․

The Role of the Infant Jesus in Catholic Tradition

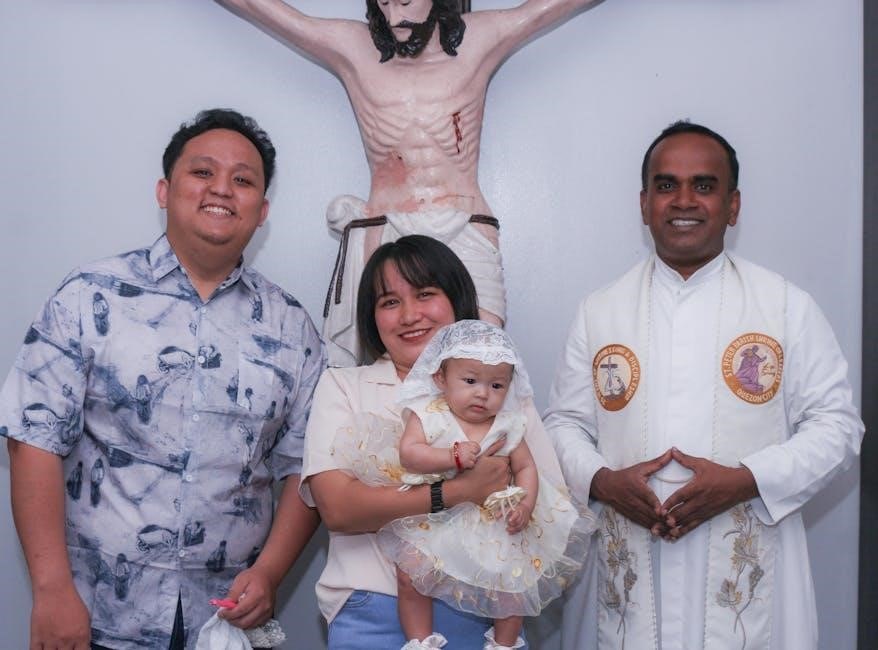
The Infant Jesus of Prague holds a revered place in Catholic tradition‚ symbolizing divine innocence and trust in God․ The statue‚ with its crowned Infant Jesus‚ embodies regal humility and grace․ Originating with the Carmelites‚ it became a global symbol of faith‚ inspiring devotion and miracles․ Catholics worldwide seek its intercession‚ reflecting deep trust in its spiritual power and divine providence․

Feast Days and Celebrations

The Infant Jesus of Prague is celebrated annually on January 11th‚ with special masses and processions honoring the miraculous statue․ The nine-day Novena preceding the feast fosters spiritual preparation and devotion․ Additionally‚ Novena masses are held from December 8-16 and January 6-14‚ culminating in the grand feast on February 11-12‚ showcasing the deep reverence and joy associated with this sacred tradition․

Infant Jesus Novena PDF Resources

Printable PDFs of the Infant Jesus Novena Prayer are available online‚ offering traditional Catholic devotion․ Sources include holyreflections․com and Catholic Online Learning Resources for easy access․

Where to Find Printable PDFs

Printable PDFs of the Infant Jesus Novena Prayer can be found on various Catholic websites like holyreflections․com and Catholic Online․ These resources provide easy access to traditional prayers and reflections‚ allowing devotees to download and use them for personal or communal worship‚ ensuring the novena is accessible to all seeking spiritual growth and divine intercession․

Benefits of Using a Digital Version

Using a digital version of the Infant Jesus Novena PDF offers convenience‚ accessibility‚ and portability․ Devotees can easily carry the prayers on their devices‚ access them anywhere‚ and share them with others․ Digital versions also reduce paper usage and allow for easy updates‚ ensuring the novena remains a modern yet timeless devotion in the digital age․

Incorporating the Novena into Daily Life

The Infant Jesus Novena can be seamlessly integrated into daily life through prayer at home or church‚ using a digital PDF for convenience and consistent devotion․

Praying at Home or in Church

The Infant Jesus Novena can be prayed privately at home or collectively in church‚ offering flexibility for devotees․ Using a PDF guide‚ individuals can easily follow daily prayers and reflections‚ ensuring consistency․ Whether in a quiet personal space or amidst a faith community‚ the Novena fosters a deeper connection with the Divine Infant‚ promoting spiritual growth and devotion․

Sharing the Devotion with Others

Sharing the Infant Jesus Novena deepens faith and fosters community; Distribute PDF guides to friends and family‚ encouraging collective prayer․ Discuss the Novena in faith groups‚ inspiring others to embrace its spiritual benefits․ Digital platforms also allow easy sharing‚ spreading the devotion widely․ By sharing‚ you help others experience the peace and miracles associated with the Infant Jesus‚ enriching their spiritual journey and yours alike․

Testimonies and Miracles Attributed to the Novena

Many faithful have shared testimonies of divine favors and healing through the Infant Jesus Novena‚ attributing blessings and miracles to His intercession‚ inspiring unwavering faith and devotion․

Real-Life Stories of Faith and Healing

Many devotees have experienced remarkable miracles through the Infant Jesus Novena․ A man regained his mobility after years of severe paralysis‚ a family found peace after a prolonged conflict‚ and a woman discovered strength during a crisis․ These testimonies highlight the Novena’s transformative power‚ fostering deeper faith and trust in the Divine Infant’s loving intercession․

How the Novena Has Impacted Lives

The Infant Jesus Novena has profoundly touched devotees worldwide‚ fostering trust in divine providence․ Many share testimonies of healing‚ comfort‚ and renewed faith․ It strengthens relationships with the Divine Infant‚ offering solace in hardships and inspiring hope․ The Novena’s prayers have helped individuals find peace‚ guiding them toward spiritual growth and a deeper connection with God․

The Infant Jesus Novena remains a powerful devotion‚ offering spiritual renewal and hope․ Its enduring appeal invites believers to trust in the Divine Infant’s loving intercession always․

The Enduring Power of the Infant Jesus Novena

The Infant Jesus Novena continues to inspire devotion worldwide․ Its timeless prayers and promise of miracles nurture faith‚ offering solace and strength in times of need․ By focusing on the Divine Infant’s mercy and grace‚ the novena becomes a profound spiritual journey‚ connecting believers to God’s infinite love and providence through consistent‚ heartfelt prayer and reflection․

Encouragement to Continue the Devotion

Embrace the Infant Jesus Novena as a lifelong spiritual practice․ Its profound prayers and promises of miracles offer enduring hope and comfort․ By continuing this devotion‚ you nurture a deeper connection with the Divine Infant‚ fostering peace‚ faith‚ and trust in God’s providence․ Let the novena’s timeless grace inspire you to seek His love and guidance in all aspects of life‚ now and forever․

new hampshire drivers manual pdf

The New Hampshire Driver’s Manual is a comprehensive guide designed to help residents understand the rules of the road, safe driving practices, and licensing procedures. Available as a downloadable PDF, it provides essential information for obtaining a driver’s license and staying informed about state-specific traffic laws.

Overview of the Manual

The New Hampshire Driver’s Manual is a detailed guide that covers essential topics for drivers of all experience levels. It is structured to provide a clear understanding of the state’s traffic laws, road safety practices, and the procedures for obtaining a driver’s license. The manual is divided into sections, each addressing specific aspects of driving, such as road signs, traffic regulations, and safe driving habits. It also includes information on the application process for driver’s licenses, including requirements for vision tests, knowledge exams, and behind-the-wheel training. The manual emphasizes the importance of adhering to New Hampshire’s driving rules to ensure safety on the roads. Additionally, it highlights the state’s commitment to reducing accidents and promoting responsible driving behaviors. Available in PDF format, the manual is easily accessible for residents to download and study. It serves as a vital resource for new drivers preparing for their exams and for experienced drivers seeking to refresh their knowledge of state-specific driving laws and regulations.

Importance of the Manual

The New Hampshire Driver’s Manual plays a crucial role in ensuring road safety and promoting responsible driving practices across the state. It serves as the primary resource for individuals seeking to obtain a driver’s license, providing detailed information on traffic laws, road signs, and safe driving techniques. The manual is essential for new drivers, as it helps them prepare for the required vision and knowledge tests. Additionally, it acts as a refresher for experienced drivers, reminding them of the state’s specific driving regulations and best practices to avoid accidents. By adhering to the guidelines outlined in the manual, drivers can contribute to a safer and more orderly traffic environment. The document also highlights the legal obligations of drivers, emphasizing the importance of compliance with New Hampshire’s motor vehicle laws. Overall, the manual is a vital tool for anyone aiming to drive confidently and responsibly in the state, ensuring both personal safety and the well-being of others on the road.

Downloading the Manual

Downloading the New Hampshire Driver’s Manual is a straightforward and convenient process. The manual is available in PDF format and can be easily accessed from the official state website. This ensures that residents can obtain the most up-to-date information without the need for physical copies. To download the manual, visit the designated webpage and select the “New Hampshire Driver Manual” option from the dropdown menu. The PDF file will then be available for immediate download, allowing users to read it on their preferred device. Additionally, an audiobook version of the manual has been created for those who prefer listening to the content. For further assistance, residents can contact the Lakes Region Driver Education at (603) 522-6877 or visit their office at 21 Cosmar Dr, Sanbornville, NH 03872. Downloading the manual is a great way to familiarize yourself with New Hampshire’s driving laws and regulations, ensuring you are well-prepared for the licensing process. This digital accessibility makes it easier than ever to stay informed and safe on the road.

Key Sections of the New Hampshire Driver’s Manual

The manual covers essential topics such as road signs and signals, traffic laws, safe driving practices, and the driver’s license application process. These sections provide a foundation for understanding New Hampshire’s driving rules and requirements.

Road Signs and Signals

The New Hampshire Driver’s Manual dedicates a detailed section to road signs and signals, ensuring drivers understand their meanings and importance. This chapter covers various types of signs, including regulatory signs like stop and yield signs, warning signs that indicate potential hazards, and guide signs that provide directional information. It also explains traffic signals, such as red, yellow, and green lights, and their significance in controlling traffic flow. Additionally, the manual addresses pavement markings, such as solid and dashed lines, and their roles in guiding drivers safely. Understanding these signs and signals is crucial for adhering to traffic laws, anticipating hazards, and maintaining road safety. The manual emphasizes how recognizing and obeying these indicators helps drivers navigate roads confidently and responsibly. By familiarizing oneself with this section, new and experienced drivers alike can improve their ability to interpret and respond to road signs and signals effectively, contributing to safer driving conditions across New Hampshire.

Traffic Laws and Regulations

The New Hampshire Driver’s Manual provides a thorough overview of the state’s traffic laws and regulations, ensuring drivers are well-informed about their legal obligations. This section explains speed limits, right-of-way rules, and the proper procedures for handling traffic stops. It also covers specific laws, such as mandatory seatbelt use, prohibitions against texting while driving, and regulations regarding child passenger safety. Additionally, the manual addresses alcohol and drug impairment laws, emphasizing the consequences of driving under the influence (DUI). The section also outlines the penalties for violating traffic laws, including fines, license suspensions, and points assessed against a driver’s record. By understanding these laws, drivers can ensure compliance and contribute to safer road conditions. The manual also highlights the importance of being aware of local ordinances and updates to state traffic regulations. This section serves as a critical resource for both new and experienced drivers, helping them navigate New Hampshire’s roads legally and responsibly.

Safe Driving Practices

The New Hampshire Driver’s Manual emphasizes the importance of safe driving practices to reduce accidents and ensure the well-being of all road users. This section provides detailed guidance on defensive driving techniques, such as maintaining a safe following distance, using turn signals, and being aware of one’s surroundings. It also covers tips for driving in various conditions, including rain, snow, and fog, which are common in New Hampshire’s climate. The manual stresses the importance of adjusting speed according to road conditions and avoiding distractions while driving, such as texting or using electronic devices. Additionally, it highlights the need to share the road safely with pedestrians, bicyclists, and large vehicles like trucks and buses. The section also discusses the proper use of safety equipment, such as seatbelts and airbags, and the dangers of driving under the influence of alcohol or drugs. By following these practices, drivers can significantly reduce their risk of being involved in a collision and contribute to a safer driving environment for everyone. This section serves as a valuable resource for both new and experienced drivers seeking to improve their driving skills and habits.

Driver’s License Application Process

The New Hampshire Driver’s Manual provides a detailed guide for applicants seeking to obtain a driver’s license. The process begins with meeting eligibility requirements, which include age and residency criteria. Applicants must pass a vision test to ensure they can safely operate a vehicle. Additionally, a knowledge test is required to assess understanding of traffic laws, road signs, and safe driving practices. For applicants under the age of 18, completion of a driver’s education program and a minimum of 40 hours of supervised practice driving is mandatory. The manual outlines the necessary documentation, such as proof of identity and residency, that must be submitted during the application process. Once these steps are completed, applicants can schedule a road test to demonstrate their driving skills. The manual also provides information on fees and the process for obtaining a learner’s permit. By following the guidelines outlined in the manual, applicants can smoothly navigate the licensing process and become legal drivers in New Hampshire.

Additional Resources and Support

Beyond the New Hampshire Driver’s Manual, residents have access to various resources to assist with driver education and licensing. The manual can be downloaded in PDF format from the official state website, ensuring easy access to the latest information. Additionally, an audiobook version of the manual is available for those who prefer listening to reading. For further support, applicants can contact the New Hampshire Department of Safety’s Driver Licensing and Vehicle Registration Division directly at (603) 522-6877. The Lakes Region Driver Education program, located at 21 Cosmar Dr. in Sanbornville, NH, offers additional guidance and courses for new drivers. The official state government website provides links to downloadable forms, such as the Criminal Record Release Authorization and Release of Motor Vehicle Records, which may be required during the licensing process. Commercial drivers can access the Commercial Drivers Manual (CDL) separately. Online resources, including practice tests and driving handbooks for all U.S. states, are also available through official portals. These resources ensure that both new and experienced drivers have ample support to navigate New Hampshire’s driving laws and regulations effectively.

conduit bending guide pdf

Conduit bending is the process of shaping electrical conduit pipes to route wiring efficiently through buildings, ensuring safe and precise connections. It requires specific tools, techniques, and skills to achieve accurate bends while maintaining conduit integrity and code compliance. Proper bending practices are essential for reliable electrical installations, making it a fundamental skill for electricians and professionals in the trade.

1.1 What is Conduit Bending?

Conduit bending involves shaping electrical conduit pipes to direct wiring through structures efficiently. It requires precise measurement and tool use to create accurate bends, ensuring safe and reliable electrical connections. Common bends include 90-degree, back-to-back, and saddle bends, each serving specific routing needs in electrical installations.

1.2 Importance of Conduit Bending in Electrical Work

Conduit bending is crucial for routing electrical wiring safely and efficiently through buildings. Proper bending ensures compliance with electrical codes, prevents wiring damage, and supports the structural integrity of installations. Accurate bends minimize wiring issues, reduce installation time, and enhance system reliability, making it a foundational skill in electrical work.

Tools and Equipment Required

Conduit bending requires specific tools, including conduit benders for EMT and rigid conduits, measuring tapes, markers, and safety gear like gloves. Proper equipment ensures accurate and safe bending.

2.1 Types of Conduit Benders (EMT, Rigid, etc;)

Conduit benders are specialized tools designed for specific types of conduits, such as EMT (Electrical Metallic Tubing) and Rigid conduits. EMT benders are ideal for thinner-walled conduits, while Rigid benders handle thicker, heavier-duty conduits. Available in various sizes (e.g., 1/2″ to 4″), they feature durable frames and precise markings to ensure accurate bends. Each type is tailored for its conduit material and bending requirements.

2.2 Measuring and Marking Tools

Accurate measuring and marking are critical for precise conduit bends. Tools like tape measures, marking pens, and bend markers ensure correct conduit lengths and bend locations. Marking gauges and templates are used to align bends consistently. Proper measurement prevents errors, while clear markings guide the bending process, ensuring the conduit fits perfectly in its intended space.

2.3 Safety Gear and Accessories

Safety gear is essential for protecting against injuries during conduit bending. Gloves prevent hand abrasions, while safety glasses shield eyes from debris. Steel-toe boots protect feet from heavy tools or falling conduit. Additional accessories like bend markers ensure accurate marking without measurement errors. Proper use of safety equipment and securing the conduit before bending are critical to preventing accidents and ensuring a safe working environment.

Basic Conduit Bending Techniques

Basic techniques involve measuring, marking, and bending conduit using specialized tools. Align the bender, apply consistent foot pressure, and complete the bend smoothly for precise results.

3.1 Measuring and Marking the Conduit

Measure the conduit length needed for the bend, marking the point where the bend will start. Use a conduit bender with built-in markings or a measuring tape to ensure accuracy. Secure the conduit and align the bender’s arrow with the mark. Apply consistent foot pressure to achieve the desired angle, ensuring the bend is precise and free from kinks.

3.2 Aligning the Bender for Accurate Bends

Aligning the bender correctly is crucial for precise conduit bending. Secure the conduit firmly to prevent movement. Position the bender so its arrow aligns with the marked bending point. Ensure the conduit is centered in the bender’s groove. Apply steady foot pressure to maintain alignment and achieve the desired bend angle without misalignment or kinking.

3.3 Applying Foot Pressure and Completing the Bend

Apply firm, steady foot pressure to the bender’s heel while guiding the handle with your hands. Avoid using the handle as a lever, as this can cause misalignment or kinking. Keep the conduit securely seated in the bender’s groove throughout the bending process. Once the bend is complete, inspect it to ensure accuracy and make adjustments if necessary.

Common Types of Bends

Common conduit bends include 90-degree, back-to-back, offset, and saddle bends, each serving specific purposes in electrical installations. Proper technique ensures safe and efficient wiring routes.

4.1 90-Degree Bends

A 90-degree bend forms a right angle, creating an “L” shape in the conduit. To achieve this, mark the conduit 8″ from the end, align the bender’s arrow with the mark, and apply firm foot pressure. Ensure the bend is precise by checking the angle with a level after completion. This bend is commonly used to route wiring around corners or obstacles, such as walls or ceilings, ensuring safe and efficient electrical connections.

4.2 Back-to-Back Bends

A back-to-back bend creates a U-shape in a single conduit length, enabling wiring to change direction twice in close succession. Measure and mark the conduit, then bend at the marks to form two 90-degree angles. Adjust for take-up by subtracting 5″ from the second bend measurement. Ensure accurate alignment and check angles with a level for smooth, professional installation.

4.3 Offset Bends

An offset bend is used to route conduit around obstacles while maintaining proper alignment. Measure the distance needed for the offset and mark the conduit. Calculate the bend angle and center-to-center spacing, using the tangent of half the bend angle multiplied by the offset distance. Adjust marks for each subsequent bend to ensure equal spacing and accurate routing. Proper planning and precise measurements are crucial for a smooth, professional installation.

4.4 Saddle Bends

A saddle bend allows conduit to be routed over obstacles while maintaining alignment. Measure the obstacle’s height and mark the conduit accordingly. Use a bending diagram to determine the correct angle and spacing. Bend the conduit in a smooth, continuous motion to ensure a precise fit. Proper technique ensures stability and compliance with electrical codes.

Advanced Bending Techniques

Advanced techniques involve making precise multiple bends, using diagrams for complex layouts, and adjusting for various conduit sizes. These methods ensure efficiency and accuracy in challenging installations.

5.1 Making Multiple Bends in a Single Conduit

Making multiple bends in a single conduit requires precise planning and execution. Measure and mark each bend accurately, using diagrams to visualize complex layouts. Adjust techniques for different conduit sizes and ensure equal spacing between bends to maintain structural integrity and meet installation requirements. Proper sequencing and alignment are critical for achieving professional results.

5.2 Adjusting for Different Conduit Sizes

When bending various conduit sizes, adjust the bender settings to accommodate diameter and material thickness. Use specific dies and inserts for accurate results, ensuring the conduit fits securely in the bender; Apply consistent foot pressure, taking care not to overbend or kink the conduit. Reference manufacturer guidelines for optimal bending techniques tailored to each size and type.

5.3 Using Diagrams for Complex Bends

Diagrams are essential for planning and executing complex conduit bends. They provide visual guidance, helping to identify bend angles, offsets, and spacing. By referencing diagrams, you can accurately mark conduit and align the bender. This method ensures precise measurements and angles, reducing errors. Diagrams are particularly useful for multi-bend configurations, enabling efficient and accurate conduit shaping for challenging installations.

Safety Precautions

Safety is crucial when bending conduit. Always secure the conduit to prevent movement during bending. Wear protective gear, including gloves and safety glasses. Avoid overbending, which can cause kinking or damage, ensuring the conduit remains intact and safe for use.

6.1 Securing the Conduit Before Bending

Securing the conduit before bending is essential to prevent movement and ensure accurate bends. On the floor, use clamps or weights to hold the conduit firmly in place. When bending in the air, ensure the bender’s handle is stabilized and supported to avoid slippage. Proper securing prevents kinks, damage, and unsafe conditions, ensuring a smooth and precise bending process every time.

6;2 Avoiding Overbending and Kinking

Avoiding overbending and kinking requires careful planning and precise technique. Apply consistent foot pressure to keep the conduit securely in the bender’s groove. Use the correct bender size for the conduit diameter to prevent excessive stress. Check the bend angle with a level or marker to ensure accuracy, and avoid twisting or forcing the conduit beyond its limits to maintain its structural integrity and safety.

6.3 Proper Use of Protective Equipment

Always wear protective gear, including gloves, safety goggles, and steel-toe boots, when bending conduit. These items protect against cuts, flying debris, and heavy objects. Ensure the bender is securely positioned to prevent accidental movement. Proper equipment use prevents injuries and ensures a safe working environment, especially when handling heavy or sharp materials during the bending process.

Troubleshooting Common Issues

Identify and correct misaligned bends, insufficient angles, or kinked conduit promptly. Use leveling tools to check accuracy and adjust as needed for proper conduit alignment and integrity.

7.1 Correcting Misaligned Bends

Misaligned bends can compromise electrical installations. To correct, ensure the conduit is secure and re-measure the desired angle. Use a level to verify alignment and adjust the bender’s position. Apply steady foot pressure while bending to maintain accuracy. If the conduit is already bent incorrectly, carefully unbend it and re-align before re-bending. Proper tools and techniques are essential for achieving precise corrections.

7.2 Fixing Insufficient Bend Angles

Insufficient bend angles occur when the conduit does not meet the required degree. To fix, re-measure and re-align the bender with the marked conduit. Apply controlled foot pressure to achieve the correct angle. Use a level to verify accuracy. If the bend is too shallow, adjust the bender’s position and re-bend carefully. Ensure the conduit remains undamaged during corrections to maintain its structural integrity.

7.3 Dealing with Kinked or Damaged Conduit

Kinked or damaged conduit can compromise electrical integrity. Assess the damage; if severe, replace the conduit. For minor kinks, use a conduit bender to carefully straighten it. Ensure the conduit’s interior is undamaged. Always check for proper alignment and integrity after repairs. Refer to diagrams in guides for complex corrections to maintain code compliance and safety standards.

Best Practices for Conduit Bending

Plan the bending sequence to minimize errors. Maintain conduit integrity by avoiding overbending. Ensure all bends comply with local electrical codes and safety standards for reliable installations.

8.1 Planning the Bending Sequence

Planning the bending sequence ensures efficiency and accuracy. Start by visualizing the conduit’s path and measuring the required lengths. Mark the conduit accurately, considering the number and type of bends needed. Plan the order of bends to minimize repositioning the bender. Use diagrams or templates to map out complex sequences. Always measure twice and bend once to avoid waste and errors. Proper planning prevents misalignment and ensures a professional finish.

8.2 Maintaining Conduit Integrity

Maintaining conduit integrity ensures durability and safety. Secure the conduit firmly before bending to prevent movement. Avoid overbending, as it can cause kinking or damage. Use the correct bender size and type for the conduit to maintain its structural strength. Regularly inspect the conduit for signs of wear or damage before and after bending.

Always clean the conduit and bender to remove dirt or debris that could compromise the bend quality. Proper handling and storage of the conduit prevent accidental damage. By following these steps, you ensure the conduit remains intact and functions as intended in the electrical system.

8.3 Ensuring Code Compliance

Ensuring code compliance is crucial for safe and legal electrical installations. Familiarize yourself with local and national regulations, such as the NEC, to guide conduit bending practices. Use approved tools and techniques to meet specified standards. Regularly reference diagrams and guidelines to ensure accuracy and adherence to code requirements, preventing violations and potential hazards.

Conduit bending is a vital skill for electricians, requiring precise techniques and proper tools. Mastery ensures safe, efficient, and code-compliant electrical installations.

9.1 Summary of Key Points

Mastering conduit bending requires the right tools, precise techniques, and adherence to safety practices. Accurate measuring, proper alignment, and controlled pressure ensure smooth, kink-free bends. Understanding common bends like 90-degree and offset bends, along with advanced methods, enhances efficiency. Maintaining precision and conduit integrity is crucial for professional results and code compliance.

9.2 Importance of Practice and Precision

Practice and precision are essential for mastering conduit bending, as they ensure accurate, professional results. Consistent training helps develop muscle memory and improves technique, reducing errors. Precision maintains conduit integrity, prevents kinks, and ensures compliance with electrical codes. Regular practice fosters confidence and efficiency, making it a cornerstone of successful conduit bending in any electrical project.

Additional Resources

Explore free PDF guides like Electrical Conduit Bending.pdf and Benfield Conduit Bending Manual for detailed techniques. Klein Tools and IDEAL benders offer official resources. Online tutorials and videos provide visual learning aids.

10.1 Recommended PDF Guides

Download essential guides like Electrical Conduit Bending.pdf and Benfield Conduit Bending Manual for comprehensive insights. These PDFs cover basic and advanced techniques, safety tips, and diagrams for complex bends. Klein Tools and IDEAL benders also offer official guides, providing step-by-step instructions and practical examples to master conduit bending skills efficiently.

10.2 Online Tutorials and Videos

Explore YouTube tutorials and manufacturer websites for detailed conduit bending videos. Klein Tools and IDEAL benders offer step-by-step guides, while forums like Electricians Guide provide practical tips. These resources cover 90-degree bends, offsets, and complex techniques, ensuring visual learners can master conduit bending with ease and precision. They complement PDF guides with hands-on demonstrations and real-world examples.

the holdovers script pdf

The Holdovers script PDF offers a compelling exploration of human connection, set in a New England prep school during the holidays․ It follows a grumpy teacher, a grieving cook, and a troubled student, showcasing emotional depth and witty dialogue․ This Oscar-nominated screenplay, written by David Hemingson, has garnered critical acclaim for its nuanced character development and heartfelt tone, making it a valuable resource for screenwriters and film enthusiasts alike․

The Origins and Development of The Holdovers

The origins of The Holdovers trace back to a collaboration between writer David Hemingson and director Alexander Payne․ Hemingson initially crafted the screenplay, which was later refined by Payne, who brought his signature style to the project․ The story is set in a 1970s New England prep school, focusing on the complex dynamics between a gruff history teacher, a troubled student, and a grieving cook․ During development, the script underwent significant revisions to enhance its emotional depth and humor, reflecting Payne’s influence․ The film marks Payne’s return to directing after a six-year hiatus, making it a highly anticipated project․ The screenplay’s evolution was shaped by its exploration of themes such as loneliness, redemption, and human connection, all set against the backdrop of the holiday season․ This period of development was crucial in refining the characters’ arcs and ensuring the story resonated with audiences․ The final script, nominated for an Oscar, showcases a balance of wit and heart, making it a standout in contemporary cinema․

Plot Summary and Key Elements

The Holdovers unfolds in a remote New England prep school during the 1970s, focusing on the story of Paul Hunham (played by Paul Giamatti), a cantankerous history teacher with a penchant for disappointment․ Forced to stay on campus over the holidays, Paul is tasked with overseeing a handful of students who have nowhere else to go․ Among them is Angus, a troubled yet resilient student, and Mary, a grieving cook who becomes entangled in their lives․ The narrative explores the complex dynamics between these characters as they navigate loneliness, regret, and the possibility of redemption․ Set against the backdrop of a quiet, almost deserted school, the story delves into their shared struggles and the unexpected bonds that form․ The script balances humor and heartache, offering a poignant yet uplifting portrayal of human connection․ Key scenes, such as a chapel gathering and heartfelt exchanges, highlight the emotional depth of the story․ The film’s setting and character-driven approach create a intimate, reflective atmosphere, making The Holdovers a compelling tale of resilience and hope․

Characters and Their Dynamics

The characters in The Holdovers are intricately crafted, with each one bringing unique depth to the story․ Paul Hunham, played by Paul Giamatti, is a gruff, world-weary history teacher whose cantankerous demeanor hides a complex inner life․ His interactions with Angus, a troubled student, and Mary, a grieving cook, reveal his softer, more empathetic side․ Angus, portrayed by Dominic Sessa, is a rebellious yet vulnerable teenager struggling to find his place in the world․ Mary, played by DaVine Joy Randolph, adds warmth and resilience to the group, serving as a bridge between Paul and Angus․ The dynamics between these characters are rooted in their shared isolation, leading to moments of tension and unexpected connection․ As they navigate their differences, they challenge each other to confront their pasts and embrace hope․ The relationships are layered with humor, heartache, and mutual understanding, creating a powerful exploration of human resilience and the transformative power of connection․ The characters’ growth and interactions are central to the film’s emotional impact, making their journeys both relatable and unforgettable․

Themes and Tone of the Film

The Holdovers delves into themes of isolation, redemption, and the power of human connection․ Set against the backdrop of a remote New England prep school during the holidays, the film explores the emotional journeys of its characters with a blend of humor and poignancy․ The tone is both heartwarming and heartbreaking, balancing witty dialogue with moments of profound introspection․ The script, written by David Hemingson, captures the nuances of flawed individuals navigating their struggles, ultimately finding hope in each other․ The film’s setting—a nearly empty campus—heightens the sense of isolation, while the characters’ interactions reveal their shared humanity․ Themes of loss, regret, and the possibility of change are woven throughout the story, creating a deeply resonant narrative․ The tone is reminiscent of Alexander Payne’s signature style, blending dry humor with emotional depth․ The film’s ability to strike a balance between light-hearted moments and heavier themes makes it a standout in contemporary cinema, offering audiences a story that is both entertaining and thought-provoking․

The Plagiarism Controversy Surrounding the Script

A notable controversy arose when Luca’s writer alleged that portions of The Holdovers script were plagiarized from one of his Black List scripts․ This claim surfaced during the film’s awards season, raising questions about the script’s originality․ David Hemingson is credited as the sole writer, though Alexander Payne acknowledged his involvement in shaping the script during interviews․ The accusation led to heightened scrutiny of the screenplay, with some industry professionals calling for greater transparency in collaborative writing processes․ Despite the claims, no conclusive evidence of plagiarism was found, and the script retained its Oscar nomination for Best Original Screenplay․ The controversy, however, underscored the complexities of intellectual property and the challenges of proving originality in creative works․ It also sparked broader discussions about the importance of proper crediting and the ethical responsibilities of filmmakers․ While the matter remains unresolved, it has left an indelible mark on the film’s legacy, highlighting the delicate balance between inspiration and imitation in storytelling․

Where to Find The Holdovers Script PDF

Accessing The Holdovers script PDF is straightforward, thanks to various online resources dedicated to screenwriting and film studies․ Platforms like Script Slug and Script City offer downloadable versions of the script, providing fans and aspiring writers with insights into David Hemingson’s storytelling techniques․ Additionally, websites such as 8FLiX and Scraps from the Loft host the screenplay, ensuring its availability for educational purposes․ These sites often update their libraries, so it’s advisable to check multiple sources to find the most recent or complete version․ For those interested in exploring more screenplays, Script Slug’s Script Library is a recommended destination, offering a diverse collection of scripts from various genres and filmmakers․ By utilizing these resources, enthusiasts can delve into the world of The Holdovers and gain a deeper understanding of its narrative and character development․

The Educational Value for Screenwriters

The Holdovers script PDF is a valuable resource for aspiring screenwriters, offering insights into crafting compelling characters, dialogue, and emotional depth․ David Hemingson’s screenplay masterfully balances humor and heart, providing lessons in tonal consistency and narrative structure․ The script’s focus on character-driven storytelling highlights the importance of nuanced development, particularly in its portrayal of flawed yet relatable individuals․ Screenwriters can study how Hemingson builds emotional arcs for each character, creating a sense of authenticity and connection․ Additionally, the script’s use of subtlety in conveying themes, such as redemption and human connection, serves as a prime example of effective storytelling․ The collaboration between Hemingson and director Alexander Payne is also evident, showcasing how a script can evolve with input from a filmmaker; For educators and writers, this script is a testament to the power of storytelling and offers practical lessons in screenwriting craftsmanship․ By analyzing the script, writers can gain a deeper understanding of pacing, dialogue, and the importance of emotional resonance in film narratives․

co z gate opener manual

Product Overview

The CO-Z Gate Opener is a cost-effective, automatic solution for sliding gates, offering ease of use, durability, and compatibility with remote controls for convenient operation.

1.1 Key Features and Benefits

The CO-Z Gate Opener offers a range of features designed for convenience and reliability. It includes a powerful motor capable of handling heavy gates, remote control operation with a range of up to 100 feet, and compatibility with smart systems for enhanced control. The opener is durable, weather-resistant, and designed for easy installation. It also supports real-time monitoring and voice assistant integration, making it a modern and user-friendly solution for home security. These features ensure smooth operation, long-lasting performance, and seamless integration with smart home systems, providing users with a reliable and efficient gating solution.

1.2 Compatibility with Smart Systems

The CO-Z Gate Opener seamlessly integrates with various smart systems, including Wi-Fi and Bluetooth technologies. It is compatible with the Remootio smart gate opener, allowing users to control their gates remotely via a smartphone app. Additionally, it supports voice assistant integration, enabling voice commands through platforms like Siri or Google Assistant. This compatibility enhances convenience, enabling real-time monitoring and control of the gate from anywhere. The system also works with smart home devices, allowing for automated scenarios such as lighting adjustments or appliance activation, making it a versatile and modern solution for home automation and security;

Installation Guide

The CO-Z Gate Opener installation is straightforward, with step-by-step instructions provided in the manual. It includes motor installation, control board setup, and remote pairing for smooth operation.

2.1 Pre-Installation Preparation

Before installing the CO-Z Gate Opener, ensure the gate is balanced and properly aligned. Check the gate’s weight and dimensions to confirm compatibility with the opener’s capacity. Prepare the necessary tools, such as a screwdriver and wrench, and ensure a stable power supply. Remove any obstacles that could interfere with the gate’s motion. Review the manual thoroughly to understand the components and steps involved. Ensure the control board and remote controls are ready for pairing. Proper preparation ensures a smooth and safe installation process, avoiding potential issues during operation. Always follow safety guidelines to prevent accidents.

2.2 Step-by-Step Installation Process

Begin by attaching the motor to the gate and securing it firmly. Next, install the control box near the gate, ensuring it is level and accessible. Connect the motor to the control box using the provided wiring, following the diagram in the manual. Install the safety sensors to prevent accidents and ensure proper alignment. Pair the remote controls by pressing the pairing button on the control board. Test the gate opener by operating it manually and remotely to ensure smooth function. Finally, review all connections and settings to confirm everything is working correctly. Always refer to the manual for specific wiring and pairing instructions.

2.3 Common Installation Mistakes to Avoid

Ensure proper alignment of the motor and gate to avoid uneven operation. Avoid loose connections, as this can lead to malfunctions. Do not overlook sensor installation, as misalignment can compromise safety features. Failing to test the gate opener after installation is a common mistake—always verify smooth operation. Incorrect wiring, such as reversing polarity, can damage the system. Neglecting to pair remote controls properly can result in poor connectivity. Overloading the gate beyond its weight capacity can cause mechanical failure. Always follow the manual’s wiring diagram and pair buttons correctly. Consult the manual if unsure to prevent these issues and ensure safe, efficient operation.

Technical Specifications

The CO-Z Gate Opener features a 90W motor, M4 gear output, and Z16 gear ratio. It supports 110V/220V AC, with a maximum capacity of 1400 lbs. Remote range is up to 100 ft. Operating temperature ranges from -25°C to 55°C, ensuring reliable performance in various climates. Net weight is 8.5 kg.

3.1 Motor Power and Capacity

The CO-Z Gate Opener is powered by a robust 90W motor, designed to handle heavy-duty operations. It has a maximum capacity of 1400 lbs (635 kg), making it suitable for large gates. The motor ensures smooth and efficient operation, even under challenging conditions. With a gear ratio of Z16 and an M4 output shaft, it delivers consistent torque and durability. This combination allows the opener to manage gates weighing up to 1800 kg, providing reliable performance for both residential and commercial applications. The motor’s power and capacity ensure long-lasting functionality with minimal maintenance required.

3.2 Power Supply and Operating Conditions

The CO-Z Gate Opener operates on a dual voltage system, supporting both AC220V and AC110V at 50/60 Hz. It is designed to function efficiently across a wide temperature range, from -25°C to 55°C, ensuring reliability in various climates. The device is built with durable components to withstand harsh weather conditions and heavy usage. Its robust design allows it to maintain consistent performance even in extreme environments. The power supply is stable, minimizing the risk of malfunctions, while the opener’s construction ensures long-term durability and reliability for both residential and commercial applications. This makes it a versatile choice for different settings.

3.3 Remote Control Range and Connectivity

The CO-Z Gate Opener comes with remote controls that offer a reliable range of up to 100 feet, ensuring seamless operation from a distance. The system supports secure pairing during installation, preventing unauthorized access. It is compatible with multiple remote controls, allowing users to add additional remotes as needed. The remote control connectivity is stable and interference-free, providing consistent performance in various environments. This feature enhances convenience, enabling users to operate the gate effortlessly whether on foot or in a vehicle. The remote control system is designed for durability and long-range functionality, making it a practical solution for both residential and commercial use.

Remote Control Programming

Program the remote by pressing the AN1 button on the control board, ensuring secure pairing. This feature prevents unauthorized access and offers effortless gate control.

4.1 Pairing the Remote Control with the Gate Opener

To pair the remote control with the gate opener, open the control board cover and press the AN1 button. This initiates the pairing process, ensuring a secure connection. Follow the manual’s instructions to synchronize the remote with the opener. The remote operates from up to 100 feet away, providing convenient control. After pairing, test the remote to ensure smooth operation. This process enhances security and ease of use for your gate system. Always refer to the manual for specific steps to avoid pairing issues. Proper pairing ensures reliable and efficient gate operation.

4.2 Security Features and Remote Control Safety

The CO-Z Gate Opener includes advanced security features to ensure safe and reliable operation. The remote control uses rolling code technology to prevent unauthorized access, while the opener’s system encrypts signals to protect against hacking. The remote control is securely paired during installation, minimizing the risk of interference or unauthorized use. Additional safety features include automatic relocking after a set period of inactivity, ensuring your property remains secure. The system also includes tamper-proof mechanisms to prevent manual override attempts. Follow the manual’s guidelines to enable these features, ensuring maximum security for your gate opener. This enhances overall safety and peace of mind.

Safety Features

The CO-Z Gate Opener features an automatic stop and reverse function, ensuring safety by detecting obstacles. Built-in sensors prevent accidents, while an emergency release mechanism allows manual operation during power failures.

5.1 Automatic Stop and Reverse Function

The CO-Z Gate Opener is equipped with a sophisticated automatic stop and reverse function, enhancing safety for users and preventing potential damage. This feature ensures the gate halts and reverses direction upon detecting any obstruction, such as a person, pet, or object, in its path. Sensors integrated into the system continuously monitor the gate’s movement, providing real-time feedback to the control unit. This not only protects property but also reduces the risk of accidents, particularly in households with children or pets. The system’s responsiveness is instantaneous, making it a reliable safety measure for automated gate operation. This feature is essential for modern gate systems.

5.2 Sensors and Emergency Release Mechanism

The CO-Z Gate Opener features advanced infrared sensors designed to detect obstacles and ensure safe operation. These sensors prevent the gate from closing on vehicles, pedestrians, or pets, enhancing overall safety. In case of a power outage or system failure, the emergency release mechanism allows manual operation of the gate. This mechanism is easily accessible and requires minimal effort to disengage the motor, enabling users to open or close the gate securely. The combination of sensors and the emergency release ensures reliability and peace of mind, making the CO-Z Gate Opener a robust solution for residential and commercial properties. This system prioritizes user safety and convenience.

Troubleshooting Common Issues

Common issues include remote control malfunctions and sensor misalignment. Ensure proper pairing and check sensor cleanliness. Resetting the system often resolves connectivity and operational problems quickly.

6.1 Common Problems and Solutions

Common issues with the CO-Z gate opener include remote control malfunctions, sensor misalignment, and gate stuttering. For remote issues, re-pair the remote with the control board. Sensor misalignment can be fixed by adjusting their positions. Gate stuttering often results from obstructions or uneven tracks, which should be cleared or leveled. If the gate stops working, check the power supply and ensure all connections are secure; Resetting the system, as outlined in the manual, can resolve many operational issues. Regular maintenance, such as lubricating moving parts, helps prevent mechanical failures and ensures smooth operation.

6.2 Resetting the Gate Opener System

To reset the CO-Z gate opener system, start by ensuring the gate is in the fully open or closed position. Locate the control board and press the reset button (usually labeled AN1) for 3-5 seconds. Release the button and wait for the system to reboot. This process clears any temporary software glitches and restores default settings. After resetting, test the gate by using the remote control or wall switch to ensure proper operation. If issues persist, refer to the manual for additional troubleshooting steps or consider contacting technical support for assistance.

Smart Features and Integration

The CO-Z gate opener integrates seamlessly with smart home systems, offering app control, real-time monitoring, and voice assistant compatibility for enhanced convenience and security.

7.1 App Control and Real-Time Monitoring

The CO-Z gate opener offers seamless app control, enabling users to operate their gates remotely via smartphones. Real-time monitoring provides live updates and notifications, ensuring users are informed about gate activity. Compatible with Apple Watch and Siri Shortcuts, the system allows voice commands and quick actions for enhanced convenience. This feature modernizes gate operation, combining security with modern technology for effortless control and peace of mind.

7.2 Voice Assistant Integration for Smart Homes

The CO-Z gate opener seamlessly integrates with popular voice assistants like Siri and Google Assistant, allowing users to control their gates hands-free. Compatible with smart home systems, this feature enhances convenience and modernizes gate operation. Users can issue voice commands to open, close, or check the gate status, ensuring effortless control. Integration with platforms like Apple’s ecosystem enables advanced automation, making it a perfect addition to any smart home setup. This feature not only adds comfort but also boosts the gate’s functionality, aligning it with current smart technology trends for a futuristic living experience.

kemper manual

The Kemper Profiling Amp is a groundbreaking digital amplifier that revolutionizes tone shaping through its innovative profiling technology. It captures the essence of any guitar amp or cabinet, offering unparalleled versatility for musicians. Designed for home, studio, and live use, it combines pristine sound quality with user-friendly controls, making it a must-have for guitarists seeking ultimate tonal flexibility.

1.1 What is the Kemper Profiling Amp?

The Kemper Profiling Amp is a digital guitar amplifier that captures and replicates the sound of any guitar amp, cabinet, or effects setup with stunning accuracy. Using advanced profiling technology, it creates precise digital models of your favorite rigs, allowing you to access a vast library of tones in one versatile unit. Designed for guitarists seeking flexibility, it combines studio-grade sound quality with intuitive controls, making it ideal for live performances, recording, and practice.

1.2 Key Features of the Kemper Profiling Amp

The Kemper Profiling Amp offers advanced profiling technology to capture and replicate any guitar amp or cabinet’s sound. It features built-in stomp effects, an expression pedal for real-time control, and a robust library of profiles. The Kemper Kone speaker and Kabinet ensure authentic tone reproduction. Rig Manager software allows easy profile management. With its compact design, intuitive interface, and versatile connectivity options, the Kemper Profiling Amp is a powerful tool for guitarists seeking professional-grade sound in any setting.

Understanding Kemper Profiling

Kemper Profiling is a revolutionary technology that precisely captures the sound of any guitar amplifier or cabinet, allowing for accurate and versatile tone replication in various settings.

2.1 What is Profiling?

Profiling is a unique process that captures the sonic fingerprint of any guitar amplifier or cabinet, preserving its tone, dynamics, and character. Using the Kemper Profiling Amp, musicians can create precise digital replicas of their favorite rigs, allowing for effortless tone switching and consistent sound reproduction across different environments. This technology eliminates the need for multiple amps, making it ideal for live performances, studio recordings, and home practice. The profiles can be shared and downloaded, offering endless tonal possibilities.

2.2 How to Create Your Own Amp Profiles

Creating custom amp profiles with the Kemper Profiling Amp involves capturing the unique tone of your guitar amplifier or cabinet. Connect your amp to the Kemper using a DI box, select the profiling mode, and the device will generate white noise to analyze the amp’s response. Adjust levels to optimize the signal, and the Kemper will create a precise digital replica. Once captured, you can refine the profile, adjust settings, and save it for future use, allowing you to access your unique tones effortlessly.

Kemper Profiling Amp Models

  • Kemper Profiler Head
  • Kemper Profiler PowerHead
  • Kemper Profiler Rack
  • Kemper Profiler PowerRack
  • Kemper Profiler Stage
  • Kemper Profiler Player

These models offer varying power options and formats to suit different needs, from home use to professional live performances.

3.1 Kemper Profiler Head

The Kemper Profiler Head is a compact, lightweight amplifier head designed for versatility. It delivers the same profiling technology as other models but in a smaller, portable format. Available in black or white finishes, it suits various musical setups. The Profiler Head includes a DI output for direct recording and live sound applications. Its compact size makes it ideal for gigging musicians seeking powerful tone options without the bulk of traditional amps. Perfect for modern guitarists needing flexibility and pristine sound quality.

3.2 Kemper Profiler PowerHead

The Kemper Profiler PowerHead is a powerful amplifier designed for live performances and studio use. Equipped with a 600W power amp, it ensures robust sound reproduction. Housed in a 19″ rack unit, it integrates seamlessly into professional setups. The PowerHead features a DI output for direct recording and speaker simulation for accurate tone reproduction. Its compact design and high power output make it ideal for musicians needing a reliable, versatile amplifier for both stage and studio environments. Compatible with the Kemper Remote for enhanced control.

3.3 Kemper Profiler Rack

The Kemper Profiler Rack is a compact, 19″ rack-mountable unit designed for seamless integration into professional setups. It does not include a built-in power amplifier, making it ideal for musicians who prefer to use external power amps or cabinets. The Rack model retains all the profiling and tone-shaping capabilities of the Kemper Profiler, offering exceptional versatility. Its slim design allows for easy installation in rack systems, while its compatibility with Kemper Kone and Kabinet ensures high-quality sound reproduction in any configuration. Perfect for studio and live environments.

3.4 Kemper Profiler PowerRack

The Kemper Profiler PowerRack is a powerful, 600-watt amplifier designed for professional musicians and rack-based setups. It combines the advanced profiling technology of the Kemper series with a robust power amplifier, eliminating the need for an external power amp. Ideal for live performances and studio environments, the PowerRack integrates seamlessly with Kemper Kone speakers and the Profiler Remote for enhanced control. Its compact 3U rack design ensures easy installation, making it a versatile choice for guitarists seeking high-quality sound reproduction and reliability.

Kemper Profiling Amp Components

The Kemper Profiling Amp includes essential components like the Kemper Kone speaker, Kabinet, and Remote, each designed to enhance performance and provide intuitive control over your sound.

4.1 Kemper Kone Speaker

The Kemper Kone Speaker is a high-quality, specially designed speaker for the Kemper Profiling Amp, optimized for direct profiling and live performance. It provides a neutral and accurate sound reproduction, capturing the full tonal range of your profiles. Compact and lightweight, the Kone Speaker is ideal for musicians who need portability without compromising on sound quality. It seamlessly integrates with the Kemper system, ensuring a consistent and professional audio experience for both studio and stage use.

4.2 Kemper Kabinet

The Kemper Kabinet is a high-quality speaker cabinet designed for use with the Kemper Profiling Amp, offering a compact and lightweight solution for live performances and studio sessions. It is optimized for direct profiling and delivers accurate sound reproduction, ensuring your tones are captured with precision and clarity. Built to withstand the demands of gigging, the Kabinet is both durable and portable, making it an ideal choice for musicians seeking reliable and professional audio performance in various settings.

4.3 Kemper Remote

The Kemper Remote is a versatile controller designed to enhance the functionality of the Kemper Profiling Amp. It provides intuitive control over rigs, effects, and settings, allowing seamless navigation during live performances. Featuring a sturdy design, the Remote offers a range of buttons and an expression pedal for real-time adjustments. It connects bidirectionally with the Profiler, ensuring smooth communication and precise control. This accessory is essential for musicians seeking to unlock the full potential of their Kemper Profiling Amp, both on stage and in the studio.

Setting Up Your Kemper Profiling Amp

Setting up the Kemper Profiling Amp involves connecting the device, configuring settings, and navigating the interface. Ensure proper connections and explore the intuitive controls for a seamless experience.

5.1 Connecting the Amp

Connect the Kemper Profiling Amp to your guitar, cabinet, or external power amplifier using the Monitor Output. For direct recording, use the XLR or TRS outputs with a DI box. Ensure proper cable connections and settings for optimal sound quality and safety. Refer to the manual for specific configurations and power requirements to avoid damage and ensure reliable performance during home, studio, or live use.

5.2 Navigating the Interface

The Kemper Profiling Amp features an intuitive touchscreen interface designed for easy navigation. Use the control knobs and buttons to access menus, adjust settings, and browse profiles. The interface provides clear visual feedback, ensuring seamless operation. Whether you’re selecting profiles, tweaking effects, or managing rigs, the layout is user-friendly, allowing both beginners and experienced players to navigate effortlessly and customize their tone with precision.

Kemper Profiling Amp Effects and Processing

The Kemper Profiling Amp offers a wide range of built-in stomp effects and advanced processing options, allowing for precise tone customization. Use the expression pedal to control effects in real-time, enhancing your sound with versatility and depth. The integrated effects seamlessly complement the profiling system, providing a comprehensive tool for crafting unique guitar tones.

6.1 Built-in Stomp Effects

The Kemper Profiling Amp features an extensive range of built-in stomp effects, including overdrive, distortion, delay, reverb, and modulation. These effects are highly customizable, allowing precise adjustment of parameters to suit any musical style. The effects can be easily combined and ordered to create complex signal chains, providing endless tonal possibilities. With its intuitive interface, the Kemper enables seamless integration of effects into your profiles, enhancing your sound without compromising the amp’s core tone.

6.2 Using the Expression Pedal

The Kemper Profiling Amp’s expression pedal offers exceptional control over various parameters, such as volume, wah, and pitch. It allows for dynamic, real-time adjustments, enhancing your performance. The pedal can be assigned to multiple effects simultaneously, providing versatile tonal shaping. Its smooth operation ensures precise control, while customizable settings enable tailored responses to your playing style. This feature is particularly valuable during live performances, where seamless transitions and expressive playing are essential for captivating audiences.

Updating and Maintaining Your Kemper Profiling Amp

Regular software updates and proper maintenance ensure optimal performance of your Kemper Profiling Amp. Always use the latest firmware and follow the manual’s guidelines for care.

7.1 Software Updates

Regular software updates are essential to unlock new features, improve performance, and fix bugs. Download the latest firmware from the Kemper website and follow the installation guide. Connect your Profiling Amp to a computer via USB and use the Kemper Rig Manager to update. Always back up your rigs before updating. Updates may include new effects, profiling enhancements, or compatibility improvements. Ensure your amp is powered on and avoid interruptions during the update process for smooth installation.

7.2 Troubleshooting Common Issues

Encounter issues? Start by checking firmware updates, as outdated software may cause instability. Use the Kemper Rig Manager for system checks and adjustments. If noise occurs, ensure proper cable connections and review the manual’s troubleshooting guide. Resetting the amp or reinstalling drivers can often resolve connectivity problems. For persistent issues, consult the Kemper support forum or contact technical support. Regular maintenance and backups are crucial to avoid data loss and ensure optimal performance.

Additional Resources

Explore the Kemper Rig Manager for profile management, online forums for community support, and comprehensive manuals. These resources enhance your Kemper experience, ensuring optimal performance.

8.1 Kemper Rig Manager

The Kemper Rig Manager is a powerful tool for organizing and managing your Kemper Profiling Amp profiles. It allows you to import, export, and organize rigs, ensuring easy access to your favorite tones. With the ability to browse and manage thousands of profiles, the Rig Manager streamlines your workflow. It also enables you to update your Profiler with the latest factory rigs and custom content. This software is essential for maintaining and enhancing your Kemper experience, providing a user-friendly interface for all your profiling needs.

8.2 Online Communities and Forums

Online communities and forums dedicated to the Kemper Profiling Amp offer a wealth of information and support. Platforms like Facebook groups, Reddit forums, and specialized music gear communities provide spaces for users to share tips, troubleshoot issues, and showcase their rigs. These forums are invaluable for learning from experienced players and staying updated on the latest Kemper-related news and updates. Engaging with these communities enhances your Profiling Amp experience and connects you with a global network of musicians.

wren kitchen cabinet sizes pdf

Wren Kitchen Cabinet Sizes offer a comprehensive guide to planning your dream kitchen. Their PDF provides detailed measurements‚ from base units to tall cabinets‚ ensuring a perfect fit. Whether you’re opting for standard or bespoke solutions‚ Wren’s resources help you make informed decisions. Explore their range‚ including cook stations‚ wine racks‚ and open shelves‚ tailored to your space and style.

Overview of Wren Kitchens and Their Product Range

Wren Kitchens is a leading UK-based kitchen retailer offering a wide range of stylish and functional kitchen solutions. Their product range includes cabinets‚ worktops‚ appliances‚ and accessories‚ catering to diverse design preferences. From modern painted finishes to classic timber effects‚ Wren provides various collections like Infinity and Vogue‚ ensuring a personalized kitchen experience. Their showrooms and expert designers help customers bring their kitchen visions to life.

Importance of Cabinet Sizes in Kitchen Design

Accurate cabinet sizes are crucial for ensuring a functional and visually appealing kitchen. Proper measurements prevent issues like poor fit‚ obstructed pathways‚ or wasted space. They also enable efficient workflow and accessibility. Correct sizing enhances aesthetic balance‚ making the kitchen look cohesive and well-planned. Wren’s PDF guide provides precise dimensions‚ helping designers and homeowners achieve a seamless fit and optimal layout for their kitchen setup.

Standard Cabinet Sizes Offered by Wren Kitchens

Wren Kitchens provides a range of standard cabinet sizes‚ including base units‚ wall units‚ and tall units‚ with dimensions tailored to fit various kitchen layouts and needs.

Base Cabinet Dimensions

Wren Kitchens offers base cabinets with standard dimensions‚ typically ranging from 300mm to 1200mm in width and 870mm in height‚ including the countertop. Depths are generally 600mm. Configurations include single or double doors‚ drawers‚ or a combination‚ providing flexibility for storage needs. Specialized base units‚ such as corner carousels or sink cabinets‚ are also available‚ ensuring tailored solutions for every kitchen layout. Dimensions may vary slightly based on specific designs or custom requests.

Wall Cabinet Measurements

Wren Kitchens’ wall cabinets are designed to maximize vertical space‚ with standard heights of 720mm or 920mm‚ including the countertop. Widths range from 300mm to 1200mm‚ while depths are typically 300mm. Configurations vary‚ offering single or double doors‚ glass-front options‚ or open shelves for added functionality. These measurements ensure a seamless fit‚ complementing base units and providing ample storage. Custom sizes may be available for tailored kitchen designs.

Tall Cabinet and Pantry Unit Sizes

Wren Kitchens offers tall cabinets and pantry units in various sizes‚ typically ranging from 1950mm to 2150mm in height‚ with widths from 300mm to 600mm. Depths are generally 300mm‚ providing ample storage. Pantry units often feature adjustable shelves for customizable organization. These units are designed to fit seamlessly with base and wall cabinets‚ ensuring efficient use of vertical space while maintaining aesthetic consistency in your kitchen design.

How to Find and Download the Wren Kitchen Cabinet Sizes PDF

Visit the official Wren Kitchens website and navigate to their resources section. Select your desired kitchen range to access the corresponding PDF guide for cabinet sizes and specifications.

Locating the Official Wren Kitchens Website

Visit the official Wren Kitchens website at wrenkitchens.com to access their resources. Ensure you’re on the correct site for authenticity. Navigate through the menu to find the ‘Downloads’ or ‘Resources’ section‚ where you can locate the cabinet sizes PDF. Verify the website’s security and authenticity before downloading any documents. This ensures you’re accessing accurate and up-to-date information for your kitchen planning needs.

Navigating the PDF Resources and Catalogs

Once on the official Wren Kitchens website‚ navigate to the ‘Downloads’ section to find the cabinet sizes PDF. Use the search bar or filters to locate the specific guide. Open the PDF and use bookmarks or the table of contents to navigate through sections. Look for detailed size charts‚ diagrams‚ and installation guides. Ensure the PDF is the latest version for accurate planning. Save or print it for easy reference during your kitchen design process.

Understanding the PDF Guide

The Wren Kitchen Cabinet Sizes PDF offers detailed size charts and diagrams‚ helping you interpret dimensions accurately. Use it to plan your kitchen design effectively‚ ensuring proper measurements and layout.

Interpreting the Size Charts and Diagrams

Interpreting Wren’s size charts and diagrams requires attention to detail. Each chart lists dimensions for base‚ wall‚ and tall units‚ ensuring clarity. Diagrams visually represent units‚ highlighting width‚ height‚ and depth. Pay special attention to service voids and clearance requirements‚ as these are critical for proper installation. Verify authenticity by ensuring the PDF is from Wren’s official website to avoid misinformation.

Using the Guide for Kitchen Planning and Design

The Wren Kitchen Cabinet Sizes PDF is an essential tool for designing your kitchen. Use it to visualize layouts‚ select units that fit your space‚ and ensure proper clearance. The guide helps plan around service voids and offers insights for optimizing storage. By referencing the size charts‚ you can make informed decisions‚ ensuring your kitchen is functional and aesthetically pleasing. This comprehensive approach streamlines the design process.

Custom and Bespoke Cabinet Options

Wren Kitchens offers made-to-measure solutions‚ allowing you to create unique storage solutions tailored to your space. From cook stations to wine racks‚ customize your kitchen with ease.

Availability of Made-to-Measure Solutions

Wren Kitchens provides made-to-measure solutions‚ allowing you to customize cabinets to fit your kitchen’s unique dimensions. Their bespoke options include tailored units for corners‚ islands‚ and specific storage needs. This service ensures a seamless fit‚ maximizing your kitchen’s functionality and aesthetic appeal while adhering to their standard size guidelines for a cohesive design.

Special Features and Additional Storage Solutions

Wren Kitchens enhances functionality with special features like pull-out shelves and adjustable compartments. Their storage solutions include larders‚ wine racks‚ and open shelves‚ optimizing space. Customizable options ensure every kitchen meets specific needs‚ blending practicality with style‚ as detailed in their PDF guide.

Installation Tips and Considerations

Ensure accurate measurements and proper service voids for smooth installation. Clearances must be maintained for appliances and doors to function seamlessly‚ as outlined in Wren’s guidelines.

Measuring Your Space for Proper Fit

Accurate measurements are crucial for a seamless installation. Measure walls‚ floor‚ and door swing to ensure cabinets fit perfectly. Corner units require service voids on their sides for proper alignment. Consider appliance clearances and walking space. Wren’s PDF guide provides detailed size charts to help plan your layout effectively‚ ensuring all units fit your kitchen dimensions without issues.

Service Voids and Clearance Requirements

Service voids are essential spaces behind cabinets for plumbing and electrical access. Ensure 50cm gaps on sides of corner units for proper alignment. Appliances need clearance for doors to open fully. Maintain at least 1 meter of walking space in high-traffic areas. Wren’s PDF details these requirements‚ helping you design a functional kitchen layout that meets both aesthetic and practical needs seamlessly.

Frequently Asked Questions About Wren Cabinet Sizes

Common queries include service void requirements‚ measurement accuracy‚ and bespoke options. Addressing these helps ensure proper fit and functionality in your kitchen design.

Common Queries and Solutions

Common questions about Wren cabinet sizes often revolve around service voids‚ measurement accuracy‚ and bespoke options. Solutions include ensuring proper clearance for pipes and appliances‚ double-checking dimensions before installation‚ and exploring custom solutions for unique spaces. Addressing these queries helps ensure a seamless fit and optimal functionality in your kitchen design‚ preventing costly adjustments later.

Addressing Measurement Mistakes and Adjustments

Accurate measurements are crucial for Wren kitchen cabinets. Mistakes can lead to ill-fitting units‚ delays‚ or costly adjustments. Common issues include incorrect wall dimensions or mismeasured service voids. To avoid this‚ double-check all measurements and consult Wren’s PDF guide or professionals. Proper planning ensures a seamless installation and optimal kitchen functionality‚ saving time and resources in the long run.

Comparing Wren Kitchens with Other Brands

Wren Kitchens offers competitive pricing and diverse cabinet sizes‚ often outperforming rivals in affordability without compromising quality‚ making them a top choice for budget-conscious homeowners.

How Wren Sizes Stack Up Against Competitors

Wren Kitchens stands out with its extensive range of cabinet sizes‚ offering flexibility and customization. While competitors like Howdens provide quality options‚ Wren excels in affordability and variety‚ catering to diverse kitchen layouts. Their PDF guide ensures precise measurements‚ making installation seamless. Wren’s commitment to quality and design rivals other brands‚ making them a preferred choice for many homeowners seeking value and style.

Price and Quality Considerations

Wren Kitchens balances affordability with quality‚ offering competitive pricing without compromising on craftsmanship. Their cabinets are durable and stylish‚ ensuring long-term value. While some competitors may offer lower prices‚ Wren’s attention to detail and superior materials justify the investment. The PDF guide highlights their commitment to excellence‚ making Wren a top choice for budget-conscious homeowners seeking high-quality kitchen solutions.

Customer Reviews and Experiences

Customers share mixed feedback on Wren Kitchens‚ praising their cabinet fit and quality while noting occasional issues with measurements and service. The PDF guide aids accurate planning.

Feedback on Wren Cabinet Sizes and Fit

Many customers praise Wren’s cabinet sizes for their precise fit‚ ensuring seamless integration into various kitchen layouts. The PDF guide’s detailed measurements are particularly commended for aiding accurate planning and installation. However‚ some users have reported discrepancies in measurements‚ highlighting the importance of double-checking specifications before finalizing orders. Overall‚ the feedback underscores the value of Wren’s resources in achieving a well-designed kitchen space.

Lessons Learned from Real Installations

Real installations highlight the importance of meticulous planning and accurate measurements when using Wren’s cabinet sizes. Some customers noted that corner units and service voids required extra attention to ensure proper alignment; Additionally‚ the weight of materials like Xena Quartz necessitated careful handling during installation. These experiences emphasize the need for thorough preparation and adherence to Wren’s guidelines to avoid costly adjustments and delays.

Wren Kitchen Cabinet Sizes PDF is a valuable resource for precise planning and design. It offers comprehensive guides‚ tailored solutions‚ and insights from real installations to enhance your kitchen design journey.

Final Thoughts on Using Wren Cabinet Sizes PDF

Using the Wren Cabinet Sizes PDF is essential for a seamless kitchen design process. It provides precise measurements‚ installation tips‚ and customization options‚ ensuring your kitchen fits perfectly. The guide helps avoid measurement mistakes and offers tailored solutions‚ making it a valuable tool for both planning and execution. Referencing it ensures a well-designed and functional kitchen space.

Next Steps in Your Kitchen Design Journey

With the Wren Cabinet Sizes PDF as your guide‚ the next steps involve finalizing your design and consulting with professionals. Use the measurements to visualize your layout‚ then schedule a consultation with Wren’s experts or a trusted installer. Ensure all specifications align with your space and preferences before proceeding with the installation. This structured approach guarantees a seamless transition from planning to realization.

goosebumps series pdf

The Goosebumps series, created by R.L. Stine, is a beloved collection of horror fiction novels that captivated millions of young readers worldwide. Known for blending spine-chilling plots with humor, the series became a cultural phenomenon, inspiring films, TV shows, and a loyal fan base. Its success lies in its ability to balance terrifying themes with relatable characters, making it accessible to both children and adults. The series has been praised for fostering a love for reading and remains a cornerstone of modern children’s literature.

1.1 Overview of the Series and Its Popularity

The Goosebumps series, written by R.L. Stine, has become a cultural phenomenon, captivating millions of readers worldwide. With over 60 books and numerous adaptations, the series blends horror and humor, appealing to a wide audience. Its popularity stems from its ability to deliver thrilling, relatable stories that resonate with young readers, making it a staple in many childhoods and a favored collection for horror fans of all ages.

1.2 Author R.L. Stine and His Contribution

R.L. Stine, the mastermind behind Goosebumps, revolutionized children’s horror fiction with his unique blend of suspense and humor. His ability to craft relatable characters and terrifying plots made the series a global phenomenon. Stine’s contribution not only popularized the genre but also inspired a generation of young readers, solidifying his legacy as one of the most influential children’s authors of all time.

1.3 Target Audience and Genre

The Goosebumps series primarily targets children and young adults, blending horror with humor and suspense. Its genre is children’s horror fiction, designed to thrill young readers without being overly frightening. The series’ appeal lies in its ability to balance scares with relatable characters, making it a favorite among both kids and adults who enjoy nostalgic, lighthearted horror stories.

Popular Titles in the Goosebumps Series

The Goosebumps series includes renowned titles like “Welcome to Dead House,” “Stay Out of the Basement,” and “Escape from the Carnival of Horrors.” These books captivate readers with thrilling plots and eerie twists, making them fan favorites and essential reads for horror enthusiasts of all ages.

2.1 “Welcome to Dead House” – The First Book

“Welcome to Dead House” is the debut book in R.L. Stine’s Goosebumps series, published in 1992. It introduces readers to the eerie town of Dark Falls, where siblings Amanda and Josh Benson encounter terrifying supernatural events in their new home. This book set the tone for the series, blending horror with humor, and remains a fan favorite for its chilling yet engaging storyline that captivates young readers.

2.2 “Stay Out of the Basement” – A Fan-Favorite

“Stay Out of the Basement” is a fan-favorite in the Goosebumps series, known for its eerie plot and suspenseful twists. The story revolves around strange occurrences in the basement, where a family discovers their father’s mysterious experiments. This book captivates readers with its blend of horror and intrigue, making it a standout title in the collection that continues to thrill fans of all ages.

2.3 “Escape from the Carnival of Horrors”

“Escape from the Carnival of Horrors” is a thrilling Goosebumps installment that draws readers into a chilling carnival setting filled with supernatural secrets and terrifying attractions. This book, known for its suspenseful plot and eerie atmosphere, captivates fans with its unique blend of horror and adventure, making it a standout title in the series.

Where to Download Goosebumps Series PDF

Goosebumps series PDFs are available for download through official sources, free platforms like Archive.org, and websites such as BestEBook.site. These options provide easy access for fans worldwide.

3.1 Official Sources for PDF Downloads

Official sources like Amazon, Barnes & Noble, and Google Books offer Goosebumps series PDFs for purchase. These platforms ensure high-quality, legally obtained copies, supporting R.L. Stine and publishers. They provide a reliable way to access the series while adhering to copyright laws, guaranteeing an authentic reading experience for fans worldwide. This method is both safe and ethical.

3.2 Free PDF Downloads from Archive.org

Archive.org offers free downloads of Goosebumps books in EPUB format, which can be easily converted to PDF. This digital archive provides access to rare titles, making it a popular choice for fans. However, users should be aware of copyright considerations and ensure they are using the platform responsibly. It’s a cost-effective way to enjoy the series while supporting preservation efforts.

3.3 Platforms Like BestEBook.site for Free Access

BestEBook.site offers a wide range of free Goosebumps PDF downloads, providing fans with easy access to their favorite horror stories. Users can search and download titles like “Stay Out of the Basement” and “Piano Lessons Can Be Murder.” While convenient, it’s essential to verify the legality and safety of downloads. Always prioritize official purchases to support authors and adhere to copyright laws.

The Significance of PDF Format for Goosebumps

The PDF format ensures Goosebumps books are easily accessible and readable on various devices, preserving the original formatting and enhancing the reading experience for fans worldwide.

4.1 Benefits of Reading in PDF Format

Reading Goosebumps in PDF format offers convenience and accessibility across multiple devices, ensuring a seamless experience. PDFs preserve the book’s original formatting, maintaining the intended visual and textual integrity. This format is eco-friendly, reducing the need for physical copies, and allows readers to access the series anywhere, making it a popular choice for fans worldwide.

4.2 Availability of Rare Titles in PDF

PDFs have made rare Goosebumps titles more accessible, allowing fans to discover hard-to-find books. Platforms like Archive.org offer free downloads, preserving these stories for future generations. Rare titles, once limited by physical availability, are now easily obtainable in digital format, ensuring the series’ legacy endures and reaches new readers globally.

Compatible Devices for Reading Goosebumps PDF

Goosebumps PDFs can be read on smartphones, tablets, e-readers like Kindle, and computers, offering flexibility and convenience for fans to enjoy their favorite stories anywhere, anytime.

5.1 Smartphones and Tablets

Smartphones and tablets are ideal for reading Goosebumps PDFs due to their portability and convenience. Readers can easily adjust font sizes for comfort and enjoy the immersive experience of these horror stories on the go, making them perfect for both casual and avid readers seeking entertainment anywhere, anytime with just a few taps.

5.2 E-Readers like Kindle

E-readers like Kindle offer a dedicated reading experience for Goosebumps PDFs, providing sharp text and glare-free screens. Their lightweight designs and long battery life make them perfect for marathon reading sessions. Enhanced features like adjustable fonts and night modes ensure comfort, allowing fans to dive into spine-tingling stories without distractions, making them an excellent choice for enjoying the series.

5.3 Computers and Laptops

Computers and laptops provide a convenient platform for reading Goosebumps PDFs, offering large screens for an immersive experience. With free PDF readers readily available, fans can easily access and enjoy their favorite books. The ability to organize files and create libraries makes it simple to manage collections, ensuring that every spine-chilling story is just a click away for readers of all ages.

Legal and Ethical Considerations

Downloading copyrighted materials like Goosebumps PDFs without authorization may violate copyright laws. Always opt for official sources to ensure legal compliance and support authors ethically.

6.1 Copyright Laws and PDF Downloads

Downloading copyrighted materials, such as Goosebumps PDFs, without authorization violates copyright laws. Unauthorized distribution or downloading can lead to legal consequences, including fines. Always ensure downloads are from official sources to avoid infringement and support creators ethically.

6.2 Supporting Authors Through Official Purchases

Purchasing Goosebumps books or official PDFs directly supports R.L. Stine and the publishing industry. Buying from authorized sources ensures authors receive fair compensation for their work. This practice promotes the creation of more engaging stories while maintaining the quality of literature. Fans can explore official eBook platforms or purchase physical copies to contribute to the series’ legacy and sustainability.

The Impact of R.L. Stine on Young Readers

R.L. Stine’s Goosebumps series significantly influenced young readers by blending horror with relatable characters, fostering a lifelong love for reading. His books introduced children to complex themes, encouraging critical thinking and imagination. The series became a cornerstone of children’s literature, shaping many readers’ literary preferences and leaving a lasting impact on their creative development during formative years.

7.1 Shaping Young Minds Through Horror

R.L. Stine’s Goosebumps series masterfully blended horror with humor, creating suspenseful stories that captivated young readers. By introducing complex themes through relatable characters, the books encouraged critical thinking and imagination. The series played a pivotal role in shaping young minds, fostering a love for reading and leaving a lasting impact on their creative and intellectual growth during formative years.

7.2 Influence on Modern Children’s Literature

The Goosebumps series revolutionized children’s literature by introducing horror as a mainstream genre for young readers. Its success inspired countless authors to explore similar themes, blending suspense with relatable characters. The series’ impact is evident in modern children’s books, which often incorporate elements of horror and suspense, proving its enduring influence on the literary landscape.

Fan Reception and Reviews

Goosebumps has garnered widespread acclaim, with fans praising its spine-chilling plots and relatable characters. Readers worldwide have shared their love for the series, creating a vibrant community that celebrates its legacy and recommends favorite titles to new generations.

8.1 Positive Feedback from Readers

Readers have consistently praised the Goosebumps series for its engaging storytelling and ability to blend horror with humor. Many fans have shared how the books sparked their love for reading and left a lasting impact on their childhood. The relatable characters, suspenseful plots, and nostalgic value have made the series a cherished part of many readers’ lives, with titles like “Welcome to Dead House” often highlighted as favorites.

8.2 Community Sharing and Recommendations

Fans actively share their love for Goosebumps, recommending titles online and through social media. Many credit the series for sparking their passion for horror and storytelling. Recommendations often highlight popular books like “Stay Out of the Basement” and “Escape from the Carnival of Horrors,” encouraging new readers to explore the series. This communal enthusiasm has helped keep the books relevant across generations.

The Future of the Goosebumps Series

The Goosebumps series continues to thrive, with new adaptations and digital releases. Disney has renewed the series, ensuring its horror legacy endures for future generations. PDF availability also preserves its accessibility, introducing the series to new readers while maintaining its classic charm. This dual approach guarantees its lasting impact on young audiences and horror enthusiasts alike.

9.1 Renewal for New Seasons and Adaptations

Disney has renewed the Goosebumps series for a second season, exciting fans with fresh storylines and adaptations. This renewal ensures the series’ horror legacy continues, blending classic themes with modern twists. New adaptations will introduce the series to a younger generation, maintaining its cultural impact and keeping it a beloved favorite among both old and new fans. Digital formats like PDF further enhance accessibility, ensuring its enduring popularity.

9.2 Digital Availability and Preservation

The Goosebumps series’ digital availability ensures its preservation for future generations. With PDF downloads from platforms like Archive.org and BestEBook.site, fans can access the books easily. This digital preservation not only enhances accessibility but also safeguards the series’ legacy, allowing readers to enjoy R.L. Stine’s timeless stories for years to come, regardless of physical copies’ availability or condition.

Tips for Reading the Goosebumps Series

Start with the first book, read in a distraction-free environment, and use bookmarks for continuity. Adjust screen settings for a comfortable reading experience.

10.1 Starting with the First Book

Begin with Welcome to Dead House, the first installment of the Goosebumps series. This sets the tone and introduces key themes. Reading sequentially helps build familiarity with the series’ style and recurring elements. Starting from the beginning ensures a cohesive experience, allowing readers to appreciate the progression of the series and its iconic storytelling. This approach enhances the overall enjoyment of R.L; Stine’s work.

10.2 Reading in the Right Environment

For an immersive experience, read Goosebumps in a quiet, cozy setting. Use a tablet or e-reader for comfort. Ensure good lighting to avoid eye strain. Minimize distractions to fully engage with the spooky stories. Reading in a dimly lit room can enhance the chilling atmosphere of the series, making it more thrilling and memorable for fans of horror fiction.

The Goosebumps series remains a timeless favorite, offering thrilling stories that captivate readers. Its availability in PDF ensures accessibility for new and returning fans alike, making it a must-explore collection for horror enthusiasts.

11.1 Final Thoughts on the Series

The Goosebumps series, beloved by millions, continues to captivate readers with its blend of horror and humor. Its enduring popularity is a testament to R.L. Stine’s ability to craft engaging stories that resonate with young audiences. The availability of the series in PDF format ensures its accessibility, allowing both new and long-time fans to enjoy the thrilling adventures. With its timeless appeal, the Goosebumps series remains a must-read for anyone who enjoys spine-tingling tales.

11.2 Encouragement to Explore the Books

Exploring the Goosebumps series is a must for any reader who loves a blend of horror and humor. With its timeless appeal, the series offers thrilling adventures that captivate both children and adults. Each book delivers unique, spine-tingling stories that keep you hooked. Start your journey today and discover why Goosebumps remains a beloved favorite, now conveniently available in PDF format for easy access.

procrastination worksheets pdf

Procrastination is a common behavior affecting productivity, often mistaken for laziness. It involves delaying tasks despite negative consequences. Worksheets, especially CBT-based ones, offer structured tools to identify and address procrastination patterns, helping individuals understand underlying causes and develop strategies to overcome them.

Understanding Procrastination

Procrastination is a common behavior where individuals delay tasks despite negative consequences. Often mistaken for laziness, it involves intentional postponement, impacting productivity. Understanding its roots is key.

Definition and Common Causes

Procrastination is defined as the intentional delay of tasks despite potential negative outcomes. It is often misunderstood as laziness but stems from deeper psychological factors. Common causes include fear of failure, perfectionism, and task aversion. These underlying issues can lead to a cycle of avoidance, worsening productivity. Worksheets designed to address procrastination, such as CBT-based models, help individuals identify these root causes and develop actionable strategies to overcome them. By understanding the motivations behind procrastination, individuals can better equip themselves to break the cycle and improve their overall efficiency and well-being. These tools provide a structured approach to self-reflection and behavior modification, making them invaluable for those seeking to change their procrastination habits.

Effects on Mental and Physical Health

Procrastination extends beyond time management, significantly impacting both mental and physical health. It often leads to increased stress, anxiety, and feelings of guilt, which can escalate into depression. The pressure of unresolved tasks may cause sleep disturbances, weakened immunity, and digestive issues. Chronic procrastination can also lead to burnout, diminishing self-esteem and overall well-being. Additionally, the avoidance of tasks may result in poor work quality, strained relationships, and missed opportunities, further exacerbating mental health struggles. Over time, prolonged procrastination can contribute to cardiovascular problems and other physical ailments due to prolonged stress. Addressing procrastination through structured tools like worksheets can help individuals recognize these patterns and work toward positive change, ultimately improving both mental and physical health outcomes.

The Role of Worksheets in Overcoming Procrastination

Worksheets play a pivotal role in helping individuals overcome procrastination by providing structured tools for self-reflection and action planning. They offer a clear framework to identify patterns, thoughts, and emotions that contribute to procrastination. By breaking tasks into manageable steps, worksheets enable individuals to create realistic goals and timelines, reducing overwhelm. Many worksheets incorporate cognitive-behavioral techniques, guiding users to challenge and reframe negative thoughts. Additionally, they help track progress, reinforcing accountability and motivation. Worksheets also serve as a space to explore personal motivations and identify distractions, fostering greater self-awareness. Regular use of these tools can lead to lasting behavioral changes, helping individuals develop healthier habits and improve productivity. Overall, worksheets are invaluable resources for addressing procrastination, offering practical strategies and psychological insights tailored to individual needs.

Types of Procrastination Worksheets

Common types include CBT-based worksheets, goal-setting templates, and task management planners. Specialized worksheets like the Anti-Procrastination Sheet and Procrastination Thought Records also exist to address specific needs.

CBT-Based Worksheets

CBT-based worksheets are designed to help individuals identify and challenge negative thought patterns driving procrastination. They often include exercises like thought records, cognitive restructuring, and behavioral experiments. These tools guide users to explore the underlying beliefs and emotions contributing to procrastination, such as fear of failure or perfectionism. By reframing unhelpful thoughts, individuals can develop more constructive attitudes toward tasks. Many CBT worksheets also incorporate goal-setting and action planning, encouraging users to break tasks into manageable steps. They may include prompts to list procrastinated tasks, analyze situational factors, and track progress. These structured exercises aim to enhance self-awareness and promote proactive behavior; Available in PDF formats, CBT-based worksheets are widely accessible and serve as effective resources for addressing procrastination systematically. They empower individuals to take control of their habits and work toward lasting behavioral change.

Goal Setting and Task Management Worksheets

Goal setting and task management worksheets are essential tools for combating procrastination by helping individuals create clear, actionable plans. These worksheets often include sections for breaking down tasks into smaller, manageable steps, setting realistic deadlines, and identifying priorities. They may also incorporate SMART goal criteria (Specific, Measurable, Achievable, Relevant, Time-bound) to ensure objectives are well-defined. Many worksheets feature templates for scheduling tasks, tracking progress, and reviewing accomplishments. Additionally, they may include space for reflecting on obstacles and strategies to overcome them. By providing a structured framework, these tools help users stay organized and focused, reducing the likelihood of procrastination. Some worksheets also introduce reward systems to motivate consistent effort. Overall, goal setting and task management worksheets empower individuals to transform vague intentions into concrete actions, fostering accountability and productivity. They are widely available in PDF formats, making them accessible for immediate use. These resources are invaluable for anyone seeking to enhance their time management skills and achieve their goals effectively.

Cognitive Behavioral Techniques for Procrastination

Cognitive Behavioral Techniques (CBT) help address procrastination by identifying and challenging unhelpful thought patterns. Worksheets guide users to reframe negative beliefs, set realistic goals, and track progress, fostering accountability and behavior change.

Identifying Cognitive Distortions

CBT-based worksheets are instrumental in helping individuals recognize cognitive distortions that fuel procrastination. Common distortions include all-or-nothing thinking, catastrophizing, and overgeneralization. By identifying these patterns through structured exercises, individuals can challenge and reframe unhelpful beliefs. Worksheets often provide checklists or prompts to explore specific scenarios where procrastination occurs, encouraging self-reflection. For example, a worksheet might ask users to list thoughts that arose before delaying a task, then evaluate their validity. This process enhances awareness of how distorted thinking perpetuates procrastination. Recognizing these distortions is the first step toward addressing them effectively, allowing individuals to develop more balanced and constructive thought patterns. Over time, this practice reduces procrastination by fostering a more realistic and positive mindset.

Restructuring Negative Thoughts

CBT-based worksheets guide individuals in restructuring negative thoughts that contribute to procrastination. By identifying and challenging unhelpful beliefs, users can replace them with more balanced and constructive alternatives. Worksheets often include thought records where individuals document negative thoughts, assess their validity, and reframe them positively. For example, a thought like “I’ll fail if I try” might be restructured to “I might face challenges, but I can learn from them.” This process helps reduce anxiety and builds confidence. Worksheets also encourage users to identify and dispute cognitive distortions, such as catastrophizing or perfectionism. Over time, this practice fosters a more realistic mindset, reducing procrastination. The structured format of worksheets makes it easier to track progress and reinforce positive thought patterns, ultimately helping individuals develop healthier ways of thinking and behaving.

Practical Strategies to Beat Procrastination

Effective strategies include task breakdown, scheduling, and reward systems. Worksheets help users prioritize tasks, set realistic timelines, and reinforce progress with positive reinforcement, fostering accountability and consistent productivity.

Task Breakdown and Scheduling

Breaking tasks into smaller, manageable steps is a proven strategy to combat procrastination. Worksheets designed for task breakdown guide users in identifying specific actions, prioritizing them, and assigning realistic deadlines. By dividing large tasks into micro-steps, individuals can reduce overwhelm and create a clear roadmap for progress. Scheduling tools within these worksheets help users allocate time blocks for each task, ensuring accountability and consistent momentum. Many worksheets include checklists and progress trackers to visualize accomplishments, reinforcing motivation. Additionally, some templates incorporate space for predicting task difficulty and planning contingency strategies, which helps users anticipate challenges and stay on track. These structured approaches empower individuals to tackle tasks systematically, transforming procrastination into productive habits. Over time, this method fosters discipline and confidence, making it easier to initiate and complete tasks efficiently.

Using Reward Systems

Implementing reward systems is a powerful strategy to overcome procrastination. Worksheets often include sections for designing personalized reward plans, helping individuals stay motivated by associating task completion with positive outcomes. By identifying specific rewards tied to achieving milestones, users create an incentive to stay on track. For example, completing a task might earn a relaxing activity or a small treat, reinforcing productive behavior. Many worksheets also incorporate checklists with reward columns, allowing users to visualize progress and anticipate the benefits of their efforts. This approach leverages psychological principles of positive reinforcement, making tasks feel less daunting and more rewarding. Over time, consistent use of reward systems can shift procrastination patterns, fostering a mindset that associates effort with gratification and personal satisfaction.

Overcoming Procrastination with Worksheets

Procrastination worksheets are invaluable tools for tackling delays and fostering productivity. By providing structured exercises, these resources help individuals identify patterns, challenge unhelpful thoughts, and develop actionable strategies. Worksheets often include sections for self-assessment, allowing users to pinpoint areas where procrastination impacts their lives most significantly. They also guide users in breaking tasks into smaller, manageable steps, reducing overwhelm and increasing momentum. Many worksheets incorporate space for tracking progress, reinforcing accountability and celebrating small wins. Additionally, they encourage users to explore underlying motivations and develop personalized reward systems to stay motivated. Over time, consistent use of these tools can lead to lasting behavioral changes, helping individuals shift from procrastination to proactive engagement. Worksheets empower users to take control of their time and tasks, fostering a mindset of accountability and self-confidence.

duraflame remote instructions

Welcome to the Duraflame Remote Instructions guide. This manual provides comprehensive steps for operating and maintaining your remote control, ensuring seamless and effortless operation.

Overview of Duraflame Remote Control Functionality

The Duraflame remote control offers a user-friendly interface to manage your electric stove or fireplace. It allows seamless operation of basic functions like turning the heater on/off and adjusting heat settings. The remote also enables advanced features such as flame effect adjustment and timer settings for a personalized experience. Additionally, it supports switching between Fahrenheit and Celsius by pressing and holding the HEATER button on the control panel for 3 seconds. The remote is powered by 2 AAA batteries, accessible via a sliding compartment on the back. Proper operation requires pressing buttons with gentle pressure to ensure reliable performance and connectivity.

Battery Replacement and Remote Maintenance

Regular maintenance ensures optimal performance. Replace batteries by sliding open the compartment on the remote’s back, removing old ones, and inserting 2 AAA batteries.

Steps to Replace Batteries in the Duraflame Remote

Replacing batteries in your Duraflame remote is a straightforward process. First, locate the battery compartment on the back of the remote. Open it by sliding the door. Remove the old batteries and insert two new AAA batteries, ensuring correct polarity. Close the compartment securely. If the remote fails to respond, check for proper battery installation or try replacing the batteries again. Proper maintenance ensures reliable operation. Avoid mixing old and new batteries to prevent performance issues. Regularly inspect the compartment for dirt or corrosion, cleaning it gently if necessary. This ensures optimal functionality and extends the remote’s lifespan. Always handle batteries with care.

Operating the Remote Control

Operate the Duraflame remote by pressing buttons with gentle, even motion. Use the power button to turn the heater on/off and adjust settings like flame and heat; Proper battery installation ensures smooth functionality. Avoid rapid button presses to maintain reliable performance. Always handle the remote with care for optimal results.

Basic Functions and Button Layout of the Duraflame Remote

The Duraflame remote features a straightforward layout designed for easy navigation. The power button turns the heater on/off, while adjacent buttons control heat settings and flame effects. A dedicated timer button allows you to set operation duration, enhancing convenience. The flame effect adjustment button offers multiple settings for a personalized experience. The remote also includes buttons for brightness and temperature adjustments, ensuring precise control. Buttons are strategically grouped by function, making operation intuitive. Pressing buttons with gentle, even motion ensures reliable performance. Proper battery installation and maintenance are essential for consistent functionality. The remote’s design prioritizes user-friendly operation, making it simple to manage your Duraflame device effectively.

Temperature Control Settings

The Duraflame remote allows easy temperature adjustment. Use the remote to turn the heater on/off. Press and hold the control panel’s HEATER button for 3 seconds to switch between °F and °C. Proper battery maintenance ensures consistent performance.

How to Adjust Heat Settings Using the Remote

To adjust heat settings using the Duraflame remote, locate the temperature control buttons. Press the up or down arrows to increase or decrease the desired temperature. The remote’s display will reflect the changes in real-time. Ensure batteries are installed correctly for optimal functionality. If the remote doesn’t respond, try replacing the batteries or checking for connectivity issues. Always operate the remote with gentle pressure and avoid rapid button presses. This ensures precise temperature control and extends the remote’s longevity. Proper maintenance guarantees consistent performance and seamless operation of your Duraflame heater.

Changing Between Fahrenheit and Celsius

To switch between Fahrenheit and Celsius on your Duraflame device, press and hold the HEATER button on the control panel for 3 seconds. The remote control does not have a dedicated button for unit conversion, so this must be done manually. Ensure the remote is functioning properly and batteries are fresh for accurate operations. This feature allows you to customize temperature readings according to your preference, enhancing user convenience. Always refer to the user manual for additional guidance on advanced settings and troubleshooting.

Advanced Features of the Duraflame Remote

The Duraflame remote offers advanced features like flame effect adjustment and timer settings, allowing users to customize their experience. Press buttons with gentle, even motion for optimal performance.

Flame Effect Adjustment and Timer Settings

To adjust the flame effect, press the fire symbol button on the remote. This button offers four settings, allowing customization of the flame’s appearance. For timer settings, locate the timer button, typically marked with a clock icon. Press and hold it to set your desired duration. Ensure buttons are pressed gently and evenly to avoid transmitter issues. Adjusting these features enhances your experience, providing control over both aesthetics and operation duration. Use these settings to tailor your Duraflame experience to your preferences. Always refer to the manual for detailed instructions. This ensures optimal performance and longevity of your remote control. Happy adjusting!

Troubleshooting Common Remote Control Issues

Address remote issues by checking battery life and ensuring proper installation. Clean buttons gently and re-pair the remote with your device if connectivity fails. Always press buttons evenly to avoid signal problems. If issues persist, consult the user manual or contact support for further assistance. Regular maintenance helps maintain optimal remote performance. Troubleshooting steps are designed to resolve common problems quickly and effectively. Follow these guidelines to ensure your remote operates smoothly and efficiently. Proper care and attention can prevent many issues from arising. Keep your remote in good condition for reliable operation.

Resolving Connectivity Problems Between Remote and Device

If the remote control fails to connect with your Duraflame device, start by replacing the batteries or ensuring they are properly installed. Check for any obstructions between the remote and the device, as signal range can be affected. Verify that the remote is paired correctly with the device by following the pairing instructions in the manual. If issues persist, reset the remote by removing the batteries for 10 seconds and reinstalling them. Clean the remote’s buttons and the device’s sensor to ensure clear communication. If problems continue, consult the user manual or contact customer support for further assistance. Regular maintenance and proper care can help prevent connectivity issues. Always press buttons evenly and avoid rapid presses, as this may disrupt the signal. Ensure the remote is operated within the recommended range for optimal performance. By following these steps, you can restore connectivity and enjoy smooth operation of your Duraflame device. Troubleshooting connectivity issues is straightforward with the right approach. Keep your remote in good condition to maintain reliable communication with your device. Proper care and attention can prevent many connectivity problems from arising. Always refer to the user manual for specific guidance tailored to your model. If connectivity issues persist despite these steps, it may be necessary to contact a professional for further assistance. Regular maintenance and proper usage are key to ensuring your remote functions effectively. By addressing connectivity issues promptly, you can continue to enjoy the convenience of controlling your Duraflame device remotely. Troubleshooting is a simple process that can save time and frustration. Always ensure the remote is used correctly and maintained regularly for optimal performance. If you encounter repeated issues, consider reaching out to the manufacturer for support. They can provide additional resources or solutions to resolve the problem. Remember, proper care and attention to your remote will ensure it continues to function reliably. If connectivity problems arise, approach them systematically and thoroughly to identify and resolve the root cause. This will help maintain seamless operation of your Duraflame device. Always prioritize regular maintenance to prevent issues before they occur. By doing so, you can enjoy uninterrupted use of your remote control and the convenience it provides. If you are still unable to resolve the issue, seek professional assistance to ensure your device is functioning properly. Connectivity problems can often be resolved with simple troubleshooting steps, but more complex issues may require expert intervention. Always follow the manufacturer’s guidelines for troubleshooting to avoid further complications. By taking these steps, you can restore connectivity and continue using your Duraflame remote with ease. Proper care and attention to your remote will ensure it remains a reliable tool for controlling your device. If issues persist, do not hesitate to reach out to the manufacturer for support. They are equipped to provide the assistance you need to resolve the problem effectively. Remember, connectivity issues are common but are often easily resolved with the right approach. Always maintain your remote and device to prevent such issues from arising. If you encounter a problem, address it promptly to avoid further inconvenience. By following these guidelines, you can ensure your Duraflame remote continues to function smoothly and efficiently. Troubleshooting connectivity issues is a straightforward process that can be completed with minimal effort. Always refer to the user manual for specific instructions tailored to your model. If you are unsure about any step, seek guidance to avoid causing further damage. Proper care and regular maintenance are essential for maintaining reliable connectivity. By prioritizing these steps, you can enjoy uninterrupted use of your Duraflame device. If connectivity problems persist despite your efforts, it may be necessary to replace the remote or consult a professional; Always ensure you are using the correct batteries and that they are installed properly. Clean the remote and device sensors regularly to maintain clear communication. By following these steps, you can resolve most connectivity issues and restore full functionality to your remote control. Proper care and attention will extend the life of your remote and ensure it continues to perform reliably. If you are unable to resolve the issue on your own, do not hesitate to contact the manufacturer for further assistance. They can provide the support you need to restore connectivity and ensure your device operates smoothly. Always remember to follow the manufacturer’s guidelines for troubleshooting to avoid causing further issues. By taking these steps, you can enjoy the convenience of your Duraflame remote for years to come. Regular maintenance and proper care are key to preventing connectivity problems and ensuring reliable performance. If you encounter any issues, address them promptly to avoid further complications. Always refer to the user manual for specific instructions and guidance. If you are still unable to resolve the problem, contact the manufacturer for professional assistance. Proper care and attention will ensure your remote continues to function effectively. By following these steps, you can resolve connectivity issues and maintain seamless control of your Duraflame device. Always prioritize regular maintenance to prevent issues before they arise. If connectivity problems persist, seek professional help to ensure your device is functioning properly. Remember, proper care and attention are essential for maintaining reliable connectivity. By addressing issues promptly and following the manufacturer’s guidelines, you can enjoy uninterrupted use of your remote control. If you are unsure about any step, consult the user manual or contact customer support for assistance. Proper care and regular maintenance are vital for ensuring your remote continues to function smoothly. By following these steps, you can resolve connectivity issues and maintain optimal performance of your Duraflame device. Always ensure you are using the remote correctly and maintaining it regularly to prevent issues. If you encounter a problem, address it systematically to identify and resolve the root cause. This will help maintain seamless operation of your device. Proper care and attention will extend the life of your remote and ensure it remains a reliable tool for controlling your Duraflame device. If connectivity issues persist despite your efforts, it may be necessary to replace the remote or consult a professional. Always follow the manufacturer’s guidelines for troubleshooting to avoid further complications. By taking these steps, you can restore connectivity and continue using your remote with ease. Proper care and attention are essential for maintaining reliable performance. If you are unable to resolve the issue on your own, do not hesitate to contact the manufacturer for further assistance. They can provide the support you need to restore connectivity and ensure your device operates smoothly. Always remember to follow the manufacturer’s guidelines for troubleshooting to avoid causing further issues. By taking these steps, you can enjoy the convenience of your Duraflame remote for years to come. Regular maintenance and proper care are key to preventing connectivity problems and ensuring reliable performance. If you encounter any issues, address them promptly to avoid further complications. Always refer to the user manual for specific instructions and guidance. If you are still unable to resolve the problem, contact the manufacturer for professional assistance. Proper care and attention will ensure your remote continues to function effectively. By following these steps, you can resolve connectivity issues and maintain seamless control of your Duraflame device. Always prioritize regular maintenance to prevent issues before they arise. If connectivity problems persist, seek professional help to ensure your device is functioning properly. Remember, proper care and attention are essential for maintaining reliable connectivity. By addressing issues promptly and following the manufacturer’s guidelines, you can enjoy uninterrupted use of your remote control. If you are unsure about any step, consult the user manual or contact customer support for assistance. Proper care and regular maintenance are vital for ensuring your remote continues to function smoothly. By following these steps, you can resolve connectivity issues and maintain optimal performance of your Duraflame device. Always ensure you are using the remote correctly and maintaining it regularly to prevent issues. If you encounter a problem, address it systematically to identify and resolve the root cause

Control Panel and Remote Compatibility

The Duraflame remote and control panel work seamlessly together, ensuring easy operation and effective communication for functions like temperature adjustments and mode changes.

Understanding the Relationship Between Remote and Control Panel

The Duraflame remote and control panel are designed to work in harmony, with the remote sending signals to the control panel to execute commands. The remote uses infrared (IR) technology to communicate with the control panel, ensuring smooth operation of functions like heat settings and flame effects. Proper alignment and distance between the remote and control panel are essential for reliable communication. If issues arise, ensuring both devices are powered on and free from obstructions can resolve connectivity problems. This synchronized system allows for convenient control over your Duraflame appliance, enhancing your user experience with ease and efficiency.

Frequently Asked Questions About Duraflame Remote

Discover answers to common queries about Duraflame remote functionality, troubleshooting, and maintenance. Addressing user concerns to ensure optimal performance and ease of use for all features.

Common Queries and Solutions for Remote Operation

Users often ask about battery replacement and connectivity issues. To resolve remote functionality problems, ensure batteries are correctly inserted and check for obstructions between the remote and device. For temperature adjustments, press and hold the HEATER button on the control panel for 3 seconds to switch between Fahrenheit and Celsius. If buttons are unresponsive, try pressing them with gentle, even motion. Repeated rapid presses may disrupt signal transmission. Refer to the manual for detailed troubleshooting steps and optimal operation tips to maintain your Duraflame remote’s performance and extend its lifespan.